

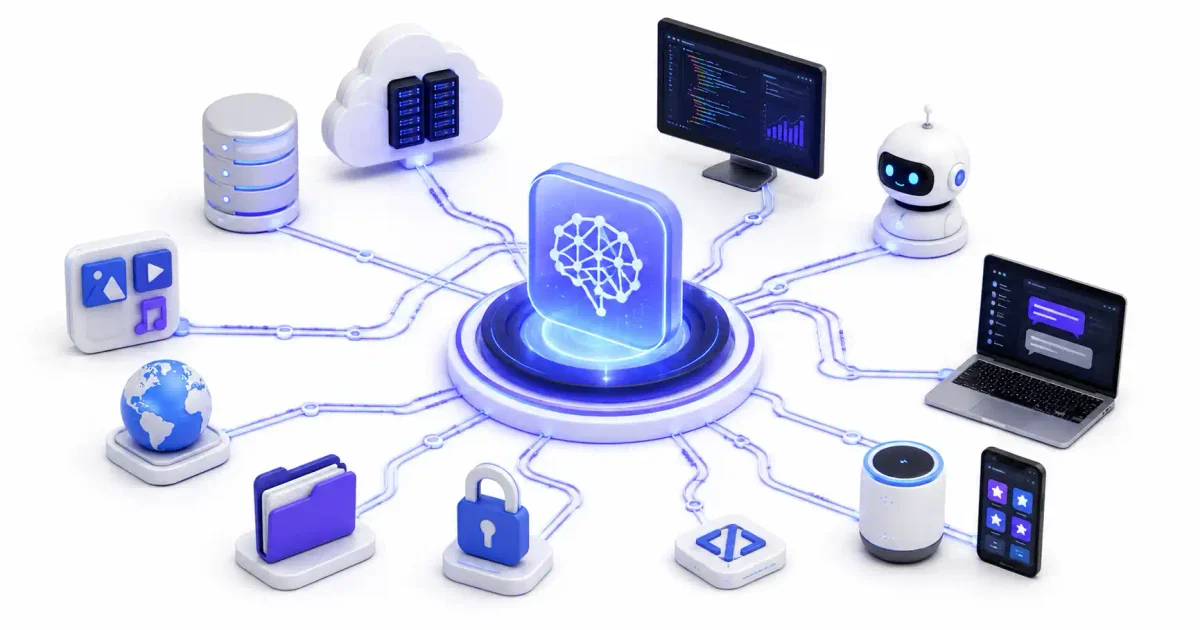
If you have been monitoring the artificial intelligence and DevOps engineering landscape recently, you have likely seen a core protocol standard dominating architectural discussions: MCP, short for Model Context Protocol.
Hailed as the universal “USB-C for AI integrations,” MCP is an open standard designed to resolve a fundamental limitation in modern software engineering: Large Language Models (LLMs) are exceptional reasoning engines, but by default they are completely isolated from operational data sources, backend databases, enterprise APIs, and local developer host systems.
Before MCP, connecting an AI model to an internal database or terminal required custom, brittle, vendor-specific glue code that had to be rewritten whenever you changed model providers. MCP standardizes this layer. Whether you consume frontier APIs in the cloud or run open-weight models locally via local AI vs cloud AI setups, MCP provides a secure, bi-directional protocol for data exchange and tool execution.
In this technical architectural guide, we will analyze why traditional AI integrations fail, examine the JSON-RPC 2.0 client-server architecture of MCP, review transport layers (stdio and Server-Sent Events), explore security boundaries, and demonstrate real-world DevOps automation workflows.
1. The Integration Problem: Why We Need MCP
To understand why MCP is rapidly becoming mandatory across the engineering landscape, we must look at how tool integration functioned prior to its introduction.
Legacy Tool Integration Pain Points
In early generative AI workflows, connecting a model to an external system (such as a database, git repository, or ticketing platform) presented several major operational hurdles:
- Vendor Lock-in & Schema Incompatibility: Function calling schemas created for OpenAI’s API could not be reused directly with Anthropic’s Claude or local open-weight models. Moving between LLM providers required rewriting prompt schemas, function payloads, and response parsers.
- Brittle Middleware Code: Developers spent hundreds of hours writing ad-hoc “glue scripts” in Python or JavaScript to format inputs, handle JSON escaping, and parse unstructured responses.
- Security & Permission Risks: Giving a cloud AI model access to system files often meant running arbitrary shell execution hooks or passing elevated credential tokens over insecure web requests.
- Lack of Dynamic Capability Discovery: Models had no standardized mechanism to query an endpoint and discover what tools, prompts, or resources were available at runtime. Every tool capability had to be static and hardcoded into initial system prompts.
The Architectural Paradigm Shift
MCP replaces N-to-N custom integration glue with a standardized 1-to-N client-server model:
- AI Client (The Host): The application hosting or orchestrating the LLM interaction (such as Claude Desktop, Cursor, Continue.dev, or an agent framework).
- MCP Protocol Layer: Standardized JSON-RPC 2.0 messages exchanged over lightweight transport channels (stdio streams or HTTP Server-Sent Events).
- MCP Server (The Provider): Lightweight processes that expose specific capability primitives—Resources, Prompts, and Tools—to the client.
Just as the USB-C physical standard allows any peripheral device (keyboards, external NVMe drives, monitors) to connect seamlessly to any host machine without custom motherboard soldering, MCP allows any AI host application to plug into any data source or execution server using a unified protocol interface.
2. Under the Hood: MCP Architecture & Component Primitives
The Model Context Protocol operates on a stateful, bi-directional client-server model built on top of the JSON-RPC 2.0 specification.
Key Architectural Primitives
MCP divides capabilities into three explicit primitives:
| Primitive | Description | Primary Use Case | Example Payload |
|---|---|---|---|
| Resources | Read-only contextual data exposed by the server | Reading local files, database schemas, log files, system metrics | file:///var/log/syslog or postgres://db/schema |
| Prompts | Pre-configured template workflows and system instructions | Standardizing code reviews, security audits, post-mortem templates | audit_security_rules(target_file) |
| Tools | Executable functions that perform side-effect actions | Executing SQL queries, creating Git commits, restarting containers | run_query(sql_string) or restart_service(container_name) |
Client-Server Lifecycle & Handshake
Communication between an MCP Client and an MCP Server follows a strict, predictable handshake protocol:
- Transport Initialization: The client spawns the MCP server process (via
stdiocommand pipe) or establishes an HTTP connection (via SSE). - Capability Negotiation: The client sends an
initializeJSON-RPC request containing its protocol version and supported features. The server responds with its protocol version and a dictionary of supported capabilities (resources,prompts,tools). - Initialized Notification: The client confirms initialization by sending an
initializednotification. The connection is now active. - Dynamic Primitive Queries: The client calls
tools/listorresources/listto inspect available server capabilities dynamically. - Tool Execution Requests: When the LLM decides to call a tool, the client dispatches a
tools/callJSON-RPC request to the server, receives the execution response, and feeds the output back to the LLM context window.
3. Transport Layers: stdio vs Server-Sent Events (SSE)
MCP specifies two primary transport channels for message serialization. Choosing the right transport depends on whether your server is co-located locally or hosted remotely.
1. Standard Input/Output (stdio) Transport
The stdio transport is designed for local, co-located execution on the same machine as the AI host application.
- Communication Channel: Messages are serialized as newline-delimited JSON-RPC objects written directly to
stdinand read fromstdout. - Process Lifecycle: The MCP Client launches the server executable directly as a child process (e.g.,
npx -y @modelcontextprotocol/server-postgres). When the client closes, the child process is terminated automatically. - Security Boundary: Inherits host OS user permissions. Because no network ports are bound, the server is immune to external network scanning or remote unauthorized requests.
2. Server-Sent Events (SSE) Over HTTP Transport
The SSE transport is designed for remote, distributed, or containerized MCP servers accessible across network subnets.
- Communication Channel: The client initiates an HTTP GET connection to an
/sseendpoint, establishing a persistent unidirectional stream for server-to-client notifications. Client-to-server requests are transmitted via standard HTTP POST calls to a/messageendpoint. - State Management: The server assigns a unique session ID to each connection, allowing stateful communication over stateless HTTP.
- Deployment Pattern: Ideal for containerized microservices hosted on bare metal or cloud platforms using container engines like Docker or Podman. Compare container runtimes in our Docker vs Podman benchmark, and learn deployment steps in our guide on installing Docker on Ubuntu.
4. Operational Security & Boundary Hardening
Giving AI models access to execute tools or query production databases introduces significant security vectors. A poorly configured MCP server can expose sensitive data or permit arbitrary remote execution.
Threat Vectors in MCP Architectures
- Prompt Injection Escalation: Malicious text ingested from external sources (such as untrusted web scraping or email content) can trick an LLM into calling destructive MCP tools (e.g.,
delete_database_tableorexfiltrate_secrets). - Unrestricted Tool Scope: Giving an MCP server root system privileges allows compromised LLM prompts to run elevated shell operations across the host OS.
- Insecure Network Binding: Exposing remote SSE MCP servers to the public internet without authentication exposes administrative APIs to malicious network scanners.
Hardening Recommendations for DevOps Engineers
To secure MCP servers in enterprise environments, implement these operational practices:
- Enforce Least Privilege File Access: Constrain local file resources to specific subdirectories using OS-level file permissions. Review our detailed guide on Linux file permissions explained to lock down read/write access, explore mandatory access controls in our AppArmor vs SELinux comparison, and test commands using our Linux command explorer.
- Network Isolation & Mesh VPNs: Never bind remote SSE endpoints to public IP addresses (
0.0.0.0). Bind them to loopback (127.0.0.1) or private mesh networks managed by Tailscale or WireGuard. Learn mesh setup in our Tailscale vs WireGuard comparison and review how VPNs work. - Hardened Ingress Proxying: Put remote MCP HTTP endpoints behind a secure reverse proxy like Nginx Proxy Manager, Traefik, or Caddy with SSL certificates. Follow our Nginx Proxy Manager security guide and learn to enable HTTPS with Let’s Encrypt.
- Firewall & Intrusion Defense: Enforce strict packet filtering using UFW and protect endpoints with Fail2ban or CrowdSec. Review our guides on firewall security, UFW firewall rules, IDS vs IPS explained, Fail2ban security setup, and CrowdSec beginner guide.
- Secret Management: Never hardcode API keys or database connection strings inside MCP server config files. Inject credentials dynamically using environment variables managed by Vaultwarden; see our Vaultwarden self-hosted guide. Generate strong keys using our password generator.
- Container Security Scanning: Package MCP servers inside lightweight Docker containers and scan images for vulnerabilities using Trivy. Follow our best practices for securing Docker containers and generate deployment manifests with our Docker Compose generator.
- Host Security Auditing: Harder host servers by auditing configuration compliance with Lynis by reviewing our Lynis security audit guide, and secure SSH keys following our SSH hardening guide for Ubuntu and top 20 Linux security commands.
5. Building a Custom MCP Server in Node.js / TypeScript
To demonstrate how MCP functions programmatically, let’s look at building a production-grade MCP server using TypeScript and the official @modelcontextprotocol/sdk.
Prerequisites
Ensure your host environment has Node.js (v18+) installed. Review our tutorial on how to build a REST API with Node.js and Express if you need a refresher on Node.js fundamentals.
Step 1: Initialize Project & Install Dependencies
Before writing the protocol handler, ensure you understand basic JSON formatting and HTTP protocol concepts. You can validate JSON payloads using our JSON formatter and JSON validator.
Initialize a clean project and install the official SDK:
mkdir mcp-devops-server
cd mcp-devops-server
npm init -y
npm install @modelcontextprotocol/sdk zod
npm install -D typescript @types/node tsx
Step 2: Implementation (index.ts)
Create an index.ts file that implements an MCP server exposing a Resource (reading server system logs) and a Tool (checking container health status):
import { Server } from "@modelcontextprotocol/sdk/server/index.js";
import { StdioServerTransport } from "@modelcontextprotocol/sdk/server/stdio.js";
import {
  ListResourcesRequestSchema,
  ReadResourceRequestSchema,
  ListToolsRequestSchema,
  CallToolRequestSchema,
} from "@modelcontextprotocol/sdk/types.js";
import { z } from "zod";
import * as fs from "fs";
import * as path from "path";

// Initialize MCP Server instance
const server = new Server(
  {
    name: "devops-monitoring-server",
    version: "1.0.0",
  },
  {
    capabilities: {
      resources: {},
      tools: {},
    },
  }
);

// 1. Expose System Log Resource
server.setRequestHandler(ListResourcesRequestSchema, async () => ({
  resources: [
    {
      uri: "file:///var/log/syslog",
      name: "System Log File",
      mimeType: "text/plain",
      description: "Read system logs for infrastructure troubleshooting",
    },
  ],
}));

server.setRequestHandler(ReadResourceRequestSchema, async (request) => {
  if (request.params.uri === "file:///var/log/syslog") {
    const logContent = fs.readFileSync("/var/log/syslog", "utf-8").slice(-2000);
    return {
      contents: [
        {
          uri: request.params.uri,
          mimeType: "text/plain",
          text: logContent,
        },
      ],
    };
  }
  throw new Error("Resource not found");
});

// 2. Expose Container Health Check Tool
server.setRequestHandler(ListToolsRequestSchema, async () => ({
  tools: [
    {
      name: "check_container_health",
      description: "Check the status of a specific Docker container",
      inputSchema: {
        type: "object",
        properties: {
          containerName: {
            type: "string",
            description: "Name of the target container (e.g., 'nginx-proxy', 'postgres-db')",
          },
        },
        required: ["containerName"],
      },
    },
  ],
}));

server.setRequestHandler(CallToolRequestSchema, async (request) => {
  if (request.params.name === "check_container_health") {
    const containerName = String(request.params.arguments?.containerName);

    // Perform health check logic (mocked for security demonstration)
    const isHealthy = true;

    return {
      content: [
        {
          type: "text",
          text: `Container '${containerName}' is currently RUNNING with 0 errors reported.`,
        },
      ],
    };
  }
  throw new Error("Tool not found");
});

// 3. Start Server over stdio transport
async function main() {
  const transport = new StdioServerTransport();
  await server.connect(transport);
  console.error("MCP DevOps Server connected over stdio");
}

main().catch((err) => {
  console.error("Server execution error:", err);
  process.exit(1);
});
Step 3: Register Server in Host Client
To use this custom MCP server inside an AI client like Claude Desktop or Cursor, add the execution command to your client’s configuration file (claude_desktop_config.json):
{
  "mcpServers": {
    "devops-monitoring": {
      "command": "npx",
      "args": ["-y", "tsx", "/path/to/mcp-devops-server/index.ts"]
    }
  }
}
Once saved, the AI host application automatically detects the file:///var/log/syslog resource and the check_container_health tool, allowing you to ask natural language questions like “Check if the nginx-proxy container is healthy and summarize recent error logs.”
6. Real-World DevOps & Infrastructure Integration Workflows
In production enterprise environments, MCP serves as the glue connecting AI assistants directly to local and cloud infrastructure.
1. Database Operations & Semantic Search
Instead of granting LLMs direct raw access to production database sockets, deploy specialized MCP database servers:
- PostgreSQL & MySQL MCP Servers: Expose schema inspection and read-only query tools. Compare database engines in our PostgreSQL vs MySQL guide.
- Vector Database Integration: Connect models to ChromaDB or pgvector to query document embeddings dynamically during RAG workflows.
- Search Engine Integration: Connect MCP servers to Meilisearch for high-speed, typo-tolerant document retrieval.
2. Workflow Automation & Self-Hosted Services
Pairing MCP with workflow engines like n8n allows AI agents to trigger complex multi-system automations. Learn how to run n8n on your own server in our guide to installing n8n with Docker Compose.
Furthermore, MCP servers can interface with self-hosted management panels and media tools:
- Manage containerized apps via Portainer, Coolify, or DokPloy. Read our installation guides for Portainer Docker management, Coolify self-hosting, and DokPloy setup.
- Query private document archives stored in Paperless-ngx by following our Paperless-ngx self-hosting guide.
- Manage personal photo metadata in Immich using our Immich self-hosted photo guide.
- Process digital documents with Stirling-PDF using our Stirling-PDF self-hosted guide.
- Monitor infrastructure uptime with Uptime Kuma; see our Uptime Kuma self-hosted guide.
- Manage internal cloud files with Nextcloud using our Nextcloud setup guide, or sync files across hosts with Syncthing using our Syncthing file sync guide.
3. Monitoring, Telemetry, and Log Analysis
When system outages occur, engineers use MCP servers to stream logs and metrics into AI diagnostic agents:
- Log File Inspection: Read log streams directly from Linux logs or centralized aggregators like Loki or Vector.
- Metrics & Latency Observability: Query Prometheus and Grafana telemetry to track CPU/GPU thermals, VRAM consumption, and API response latency.
- Process & Systemd Control: Inspect service unit states using systemd commands; review our guide on systemd explained for beginners and generate configs with our systemd service file generator.
7. Official Documentation & References
- Model Context Protocol Official Specification: https://modelcontextprotocol.io
- MCP TypeScript SDK Repository: https://github.com/modelcontextprotocol/typescript-sdk
- MCP Python SDK Repository: https://github.com/modelcontextprotocol/python-sdk
- Official MCP Server Registry: https://github.com/modelcontextprotocol/servers
- JSON-RPC 2.0 Specification: https://www.jsonrpc.org/specification
8. Frequently Asked Questions
What is the Model Context Protocol (MCP)?
MCP is an open, standardized client-server protocol created by Anthropic that allows AI applications (clients) to discover and interact with external data sources, tools, and local filesystems (servers) using JSON-RPC 2.0 messages.
Why is MCP called the “USB-C for AI”?
Just as USB-C replaced dozens of proprietary charging and display cables with a single hardware connector, MCP replaces custom, vendor-specific function calling glue code with a single standardized protocol that works across all supported LLM providers and host applications.
How does MCP differ from traditional LLM Function Calling?
Function calling is typically vendor-specific (e.g., OpenAI Function Calling) and requires hardcoding tool schemas into API payloads. MCP is vendor-agnostic and stateful: it allows host applications to dynamically discover tools, read resources, and execute prompts exposed by independent server processes without modifying application code.
Can I run MCP servers locally on my own computer?
Yes. MCP natively supports a stdio (standard input/output) transport, where the AI client launches the MCP server process locally on the same host machine. This operates completely offline with zero network exposure.
What are the main components of the MCP architecture?
The architecture consists of MCP Clients (AI host applications like Cursor or Claude Desktop), MCP Servers (lightweight data and tool providers), and three capability primitives: Resources (read-only data), Prompts (templated workflows), and Tools (executable functions).
Is MCP limited to Anthropic’s Claude models?
No. While Anthropic initiated the open-source specification, MCP is an open community standard. Any AI application, local LLM interface (like Ollama or Open WebUI), or model provider can implement MCP client or server capabilities.
How do I secure a remote MCP server running over HTTP?
Remote MCP servers running over HTTP/SSE should never be exposed to public networks without protection. Bind them to local or mesh interfaces (using Tailscale or WireGuard), place them behind a reverse proxy (like Nginx Proxy Manager or Caddy) with TLS, enforce UFW firewall rules, and use Fail2ban or CrowdSec to prevent unauthorized access.
What programming languages can I use to build MCP servers?
Official SDKs are available for TypeScript/Node.js and Python. However, because MCP relies on standard JSON-RPC 2.0 over stdio or HTTP, you can build an MCP server in any programming language including Go, Rust, C++, or Java.
Can an MCP server execute destructive actions on my server?
Yes, if configured with elevated execution tools. If an MCP server exposes tools that run arbitrary shell commands or execute database write queries, a prompt injection attack could trigger those tools. Always enforce least-privilege permissions and restrict tools to safe, validated actions.
Where can I find pre-built MCP servers?
The official Model Context Protocol GitHub repository (github.com/modelcontextprotocol/servers) maintains a registry of pre-built open-source servers for PostgreSQL, GitHub, FileSystem, Slack, Google Drive, Git, and sqlite.

Discussion
Loading comments...