

Browser ad blockers are great, but they only protect the specific browser you installed them in. Your smart TV, your phone’s background apps, your game console, and every IoT device on your network are still constantly dialing home, loading tracking pixels, and serving unskippable ads.
To fix this, you have to move the ad-blocking layer upstream. Pi-hole solves this at the network level by acting as a DNS sinkhole. It intercepts DNS requests from every device on your network, checks them against massive, community-maintained blocklists, and simply refuses to resolve domains known to serve ads and malware. If you configure your home router to use Pi-hole, every single device on your network benefits instantly—with zero client-side extensions required.
It is free, entirely open-source, and so lightweight that it was originally designed to run on a cheap Raspberry Pi. Having deployed Pi-hole across dozens of home labs and small business networks, I consider it an absolute mandatory layer in any secure home server checklist.
In this comprehensive guide, we will walk through the underlying mechanics of DNS sinkholing, deploy Pi-hole via Docker Compose, configure your router for network-wide blocking, pair it with Unbound for ultimate DNS privacy, and secure the management dashboard behind a reverse proxy.
Quick Answer: What is Pi-hole?
Pi-hole is a self-hosted DNS server that acts as a network-wide ad blocker. Instead of installing ad-blocking software like uBlock Origin on every device, you point your entire home network’s DNS traffic to Pi-hole. When a device requests a legitimate website, Pi-hole forwards the request normally. When a device requests an ad or tracking domain, Pi-hole blocks the request by returning a null IP address (a “sinkhole”), stopping the ad from ever downloading.
How Network-Level DNS Sinkholing Works
If you aren’t exactly sure what DNS is, think of it as the internet’s phonebook. Every time a device wants to reach netflix.com or google-analytics.com, it first asks a DNS server to translate that domain name into a machine-readable IP address.
Usually, that request goes straight to your ISP’s DNS servers or a public one like Cloudflare (1.1.1.1).
Pi-hole inserts itself into the middle of this transaction:
- The Request: Your smart TV tries to load a tracking pixel from
telemetry.samsung.com. - The Sinkhole (Gravity): The request hits your local Pi-hole server. Pi-hole checks its local database (powered by an engine called Gravity) against millions of known tracker domains.
- The Block: Pi-hole recognizes the telemetry domain. Instead of fetching the real IP address, Pi-hole instantly returns
0.0.0.0(null) to the TV. - The Result: The TV’s connection fails instantly and silently. The tracker never loads, saving you bandwidth and preserving your privacy.
Because this blocking happens before a connection is ever made, it stops trackers that browser-based blockers completely miss, and it adds negligible latency to your overall browsing experience.
System Prerequisites
Pi-hole is one of the lightest self-hosted services available.
- Processor (CPU): Any single-core ARM or x86_64 CPU is more than enough.
- Memory (RAM): 512 MB is sufficient. If you use massive custom blocklists (millions of domains), you might need 1 GB. For more on memory consumption, read how Linux memory management works.
- Storage: Under 1 GB for the application, blocklists, and the query database (which you can periodically prune).
- Network: A static local IP address for the machine hosting Pi-hole is absolutely mandatory. If your Pi-hole host changes IP via DHCP, your entire network will lose internet access.
- Software: We will deploy this using Docker and Docker Compose on a Linux host. If your server is bare metal, review our guide on installing Docker on Ubuntu.
Step-by-Step Docker Installation
While you can install Pi-hole directly onto a host OS, deploying it via a secure Docker container keeps your host system clean and makes backups infinitely easier.
Create a dedicated directory for the deployment stack:
mkdir -p ~/docker-stacks/pihole
cd ~/docker-stacks/pihole
Create the deployment configuration file:
nano docker-compose.ymlPaste the following YAML configuration:
version: "3.8"

services:
  pihole:
    container_name: pihole
    image: pihole/pihole:latest
    environment:
      TZ: "America/New_York"
      WEBPASSWORD: "ChangeThisToAStrongPassword"
    volumes:
      - ./etc-pihole:/etc/pihole
      - ./etc-dnsmasq.d:/etc/dnsmasq.d
    ports:
      - "53:53/tcp"
      - "53:53/udp"
      - "80:80/tcp"
    restart: unless-stopped
    cap_add:
      - NET_ADMIN
Deconstructing the Configuration
WEBPASSWORDvariable: This sets the password for the web management dashboard. Generate a robust password using a Password Generator or a vault like Vaultwarden or KeepassXC. If you leave this variable empty, a random password will be generated and printed to the container logs on startup.- Persistent Volumes: The
./etc-piholeand./etc-dnsmasq.dvolumes ensure that your blocklists, whitelist rules, and query history survive container updates and reboots. - Port
53(TCP/UDP): The standard port for DNS traffic. Crucial Note: Many modern Linux distributions (like Ubuntu and Debian) runsystemd-resolvedby default on port 53. If port 53 is occupied, the Docker container will fail to start. We will address this in the troubleshooting section below. - Port
80: Exposes the admin web dashboard. Later, you should place this behind a reverse proxy. NET_ADMINcapability: This elevated privilege is required so the container can interact directly with network-level routing, particularly if you plan to use Pi-hole’s built-in DHCP server.
Launch the stack in detached mode:
sudo docker compose up -dCheck the logs to confirm a clean startup:
sudo docker compose logs -fInitial Setup & Pointing Your Network at Pi-hole
- Open your web browser and navigate to
http://<YOUR_SERVER_IP>/admin. - Log in with the password you defined in the
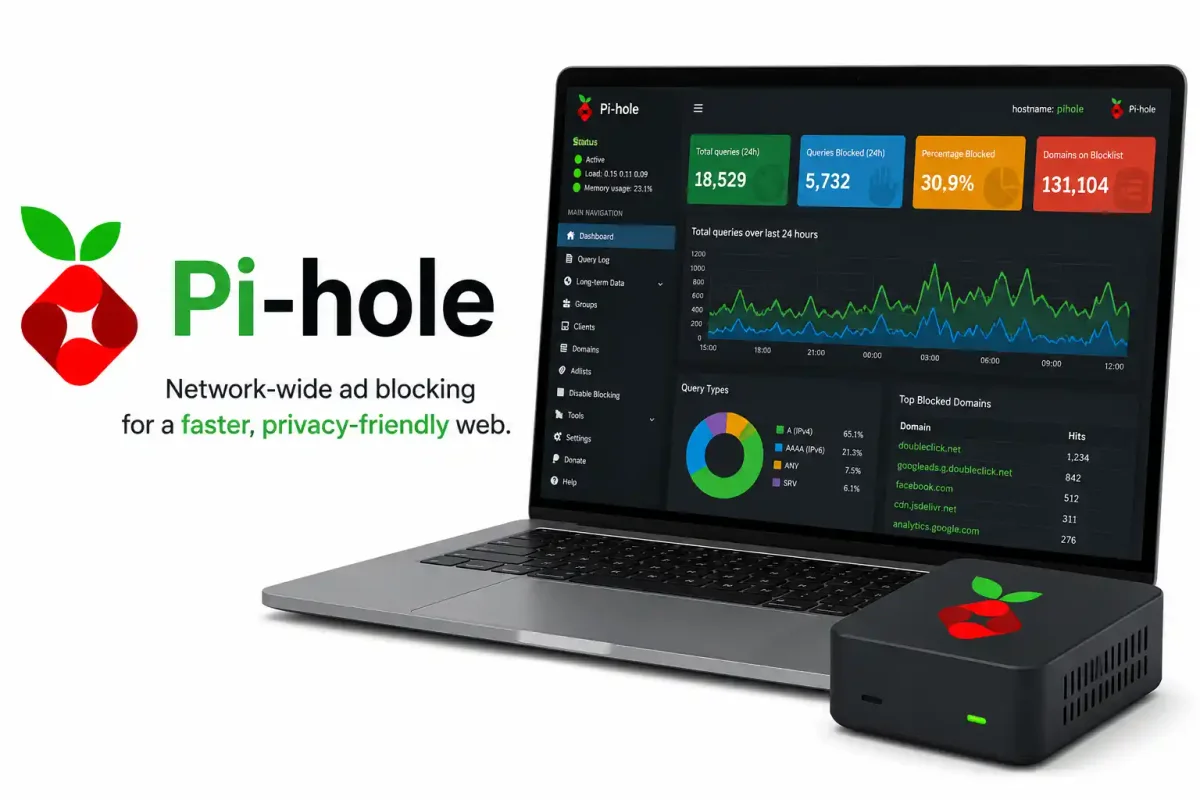
WEBPASSWORDenvironment variable. - You will see the beautiful Pi-hole dashboard, showing empty metrics because no devices are querying it yet.
Now, you must instruct your network devices to use Pi-hole for DNS resolution. You have three options:
Option 1: Router-Wide Configuration (Recommended)
Log into your home router (e.g., a pfSense / OPNsense appliance, or your ISP-provided router). Navigate to the DHCP/LAN settings and change the primary DNS server IP address to the static IP of your Pi-hole host. Remove any secondary DNS entries (like 8.8.8.8) unless you have a second Pi-hole instance, otherwise devices will bypass Pi-hole and fetch ads through the secondary server.
This method covers every device on your network instantly—even smart bulbs and TVs where you cannot manually change DNS settings.
Option 2: Pi-hole as a DHCP Server
If your ISP’s router is heavily locked down and does not allow you to change DNS settings, you can disable the DHCP server on your router entirely and enable the DHCP server built into Pi-hole (under Settings > DHCP). Pi-hole will then assign IP addresses to your devices and automatically hand out its own IP for DNS.
Option 3: Per-Device Configuration
If you only want to protect a specific device (or want to test the setup before rolling it out to the family), go into the Wi-Fi or Ethernet settings of your PC or smartphone and manually set the DNS server to your Pi-hole’s IP.
Once applied, run a test. Open a known ad-heavy news website. You should immediately notice empty spaces where banners used to be, and your Pi-hole dashboard’s Query Log will light up with blocked domains.
Expanding Your Blocklists (Gravity)
Pi-hole ships with a solid default blocklist maintained by StevenBlack, but its true power lies in how easily you can customize it.
To add new blocklists:
- Go to Group Management > Adlists.
- Paste the URL of a reputable, community-maintained list (such as the popular Wally3K ticked lists or OISD).
- Click Add.
- Go to Tools > Update Gravity and click the large update button. Pi-hole will reach out, download the new domain lists, deduplicate them, and apply them to the sinkhole database.
Whitelisting False Positives
Occasionally, an aggressive blocklist will break a legitimate website or service (e.g., blocking an affiliate tracking link you actually wanted to click, or breaking a smart TV streaming app).
To fix this, go to the Query Log, find the blocked domain marked in red, and click the Whitelist button next to it. Whitelist changes take effect instantly; there is no need to update Gravity again.
Securing the Dashboard and External Access
Your Pi-hole dashboard controls internet access for your entire network. It should be treated with extreme care.
If you plan to access the dashboard remotely (which I do not generally recommend for DNS), you must place it behind a secure reverse proxy like Nginx Proxy Manager, Traefik, or Caddy.
- Deploy your reverse proxy (read our Nginx Proxy Manager Security Guide for best practices).
- Create a proxy host (e.g.,
dns.homelab.local) pointing to your Pi-hole container’s IP on port80. - Enable Force SSL and attach a valid Let’s Encrypt certificate.
CRITICAL WARNING: Never port-forward port 53 (TCP/UDP) to the open internet. If you expose an open DNS resolver to the public internet, it will be discovered by botnets within hours and used to launch massive DNS amplification DDoS attacks against third parties, likely causing your ISP to terminate your internet connection.
If you want ad-blocking on your smartphone while on cellular data, use an authenticated VPN tunnel like Tailscale or WireGuard to securely route your phone’s DNS traffic back to your home Pi-hole.
For host-level security, ensure you have configured a UFW Firewall and installed Fail2ban.
Advanced Privacy: Adding Unbound
By default, Pi-hole forwards legitimate DNS requests to public upstream servers (like Google, Cloudflare, or Quad9). While Pi-hole stops ads, your upstream provider still sees a complete log of every legitimate website you visit.
To achieve total DNS privacy, you can install Unbound alongside Pi-hole. Unbound is a secure, recursive DNS resolver. Instead of asking Google for the IP address of reddit.com, Unbound communicates directly with the internet’s root DNS servers to resolve the domain yourself. This cuts third-party analytics companies out of your browsing habits entirely.
Integrating Unbound is a slightly advanced topic, but the official Pi-hole documentation provides a flawless setup guide for configuring the two services to work in tandem.
Backup and High Availability
If the machine running Pi-hole reboots or crashes, every device on your network will lose internet name resolution.
Mitigating Downtime
The absolute best practice for a stable home network is to run two instances of Pi-hole on separate physical hardware (e.g., one on your primary Proxmox VE server and one on a dedicated Raspberry Pi). You then enter both IP addresses into your router’s primary and secondary DNS fields. If one node goes down for maintenance, the network seamlessly fails over to the second node. You can use tools like gravity-sync to keep the blocklists of both nodes synchronized automatically.
Backing Up Configuration (Teleporter)
Pi-hole includes a native backup tool called Teleporter. It archives your blocklists, whitelist entries, and local DNS records into a single .tar.gz file.
You can automate this via a simple Bash script scheduled with Crontab:
#!/bin/bash
BACKUP_DIR="/mnt/backups/pihole"
TIMESTAMP=$(date +%F)
mkdir -p "$BACKUP_DIR"

# Export the Teleporter archive from inside the Docker container
sudo docker exec pihole pihole -a -t "$BACKUP_DIR/pihole_$TIMESTAMP.tar.gz"

# Retain only the last 14 days of backups
find "$BACKUP_DIR" -type f -name "pihole_*.tar.gz" -mtime +14 -delete
Sync this backup directory to an off-site location using a tool like Restic or BorgBackup, as covered in our self-hosted backup strategies guide.
Troubleshooting Common Issues
| Issue / Symptom | Primary Cause | Troubleshooting / Diagnostic Action |
|---|---|---|
| Container fails to start, Error binding port 53 | systemd-resolved is already using port 53 on the host. | Disable the stub listener in /etc/systemd/resolved.conf and restart the service, or use a macvlan Docker network. |
| Devices still show ads after router configuration | Router has secondary DNS set to 8.8.8.8. | Remove all secondary DNS entries in the router. Devices will silently bypass Pi-hole if a public secondary is provided. |
| A specific app or website breaks entirely | An essential domain is caught in a blocklist. | Open the Pi-hole Query Log, replicate the action that breaks the site, identify the blocked red domain, and click “Whitelist”. |
| Dashboard is unreachable after updating the container | The persistent volume paths were incorrect or corrupted. | Check the logs using docker compose logs -f. Ensure your ./etc-pihole permissions are correct for the container user. |
| Query database consuming gigabytes of disk space | Long-term query logging is enabled with no pruning. | Navigate to Settings > Privacy and adjust the log retention duration (e.g., 7 days) to prevent infinite database growth. |
Pi-hole vs. AdGuard Home
When researching DNS ad-blockers, you will inevitably compare Pi-hole to AdGuard Home.
| Feature / Metric | Pi-hole | AdGuard Home |
|---|---|---|
| Development | Open-source, community-driven | Open-source, backed by AdGuard commercial |
| Docker Support | Excellent | Excellent |
| DNS-over-HTTPS (DoH) / DoT | Requires extra tools (like cloudflared) | Built-in natively |
| Interface Style | Highly detailed, analytical | Modern, streamlined |
| Parental Controls | Manual (via regex/blocklists) | Native one-click toggles |
| Blocklist Ecosystem | Massive, industry standard | Excellent |
For users who want deep, granular control over every query and a massive ecosystem of community scripts (like gravity-sync), Pi-hole remains king. For users who want encrypted DNS (DoH/DoT) and parental controls built-in without touching the command line, AdGuard Home is a fantastic alternative.
Frequently Asked Questions (FAQ)
What exactly is Pi-hole?
Pi-hole is a self-hosted, network-wide ad blocker that acts as a DNS sinkhole. It blocks ads, tracking pixels, and malicious telemetry domains for every device connected to your network—including smart TVs, phones, and IoT devices—without requiring you to install browser extensions on each individual client.
Does Pi-hole block YouTube video ads or Twitch ads?
No. Pi-hole blocks ads at the DNS level. Companies like Google (YouTube) and Twitch serve their video advertisements from the exact same domain names as their actual video content. If Pi-hole blocked the ad domain, it would also block the video. To block YouTube ads, you still need a browser-level content blocker like uBlock Origin.
Will running Pi-hole slow down my internet connection?
No. In almost all cases, Pi-hole significantly speeds up your web browsing experience. By preventing ad networks and tracking scripts from ever initiating a connection, web pages download less data and render much faster. Furthermore, caching DNS queries locally often reduces latency compared to querying your ISP.
What happens if my server running Pi-hole crashes or goes offline?
If your Pi-hole host goes offline, any device relying on it for DNS will lose the ability to resolve domain names, effectively breaking their internet access. To prevent this, you should run a secondary Pi-hole instance on another machine (like a Raspberry Pi) to provide failover redundancy.
Why am I getting a “port 53 in use” error when starting the Docker container?
Many modern Linux distributions, particularly Ubuntu, run a native DNS resolution service called systemd-resolved that binds to port 53 by default. You must disable the systemd-resolved stub listener by editing /etc/systemd/resolved.conf and setting DNSStubListener=no, then restart the service, before Docker can bind to the port.
How do I update Pi-hole when running it in Docker?
To update a Dockerized Pi-hole, navigate to your compose directory, pull the latest image with docker compose pull, and recreate the container with docker compose up -d. Because your configurations are stored in persistent external volumes, your blocklists and settings will seamlessly carry over to the new version.
Is it safe to port-forward my Pi-hole to the open internet so I have ad-blocking on the go?
Absolutely not. You must never expose port 53 to the public internet. Open DNS resolvers are actively scanned by botnets and hijacked to perform DNS amplification DDoS attacks against other networks. If you want remote ad-blocking on your smartphone, set up a secure VPN like Tailscale or WireGuard to tunnel back into your home network safely.
How do I fix a website that broke because of Pi-hole?
If a legitimate website or application stops working, log into the Pi-hole web dashboard and open the Query Log. Reload the broken app on your device, and watch the log for blocked domains (highlighted in red) originating from that device’s IP. Click the Whitelist button next to the relevant domain to allow it through.
Does Pi-hole hide my browsing history from my ISP?
By default, no. While Pi-hole stops ads, the legitimate DNS requests it allows through are still forwarded in plain text to your upstream DNS provider (like Google or your ISP), who can log them. To hide your DNS history from your ISP, you must configure Pi-hole to use encrypted DNS-over-HTTPS (DoH) using a tool like cloudflared, or route it through a recursive resolver like Unbound.
Can I run Pi-hole alongside other management tools like Portainer?
Yes. Because Pi-hole is so lightweight, it comfortably runs alongside other management containers like Portainer, monitoring tools like Uptime Kuma, or reverse proxies like Nginx Proxy Manager on the same Docker host, provided there are no port conflicts (specifically port 80 or 53).
Conclusion
Pi-hole elevates network-level ad blocking from a tedious per-browser chore into a seamless, “set it and forget it” piece of essential infrastructure. It protects every device you own, significantly reduces network telemetry, and puts you back in control of your data.
When paired with a hardened reverse proxy, a secondary DNS fallback node, and an automated Teleporter backup routine, Pi-hole becomes one of the most reliable and highest-impact services in any modern homelab.
Once your network-wide blocking is live, ensure the rest of your self-hosted stack is equally resilient. Check out our guides on deploying Portainer for container management or building a Proxmox VE Home Lab to isolate your services effectively.
Official Documentation
For deep technical troubleshooting, API access, and advanced deployment configurations, refer to the primary sources:
- Pi-hole Official Website: https://pi-hole.net/
- Pi-hole Documentation: https://docs.pi-hole.net/
- Pi-hole Docker GitHub Repository: https://github.com/pi-hole/docker-pi-hole
- Unbound Recursive DNS Guide: https://docs.pi-hole.net/guides/dns/unbound/
- StevenBlack Hosts (Default Blocklist): https://github.com/StevenBlack/hosts


Discussion
Loading comments...