

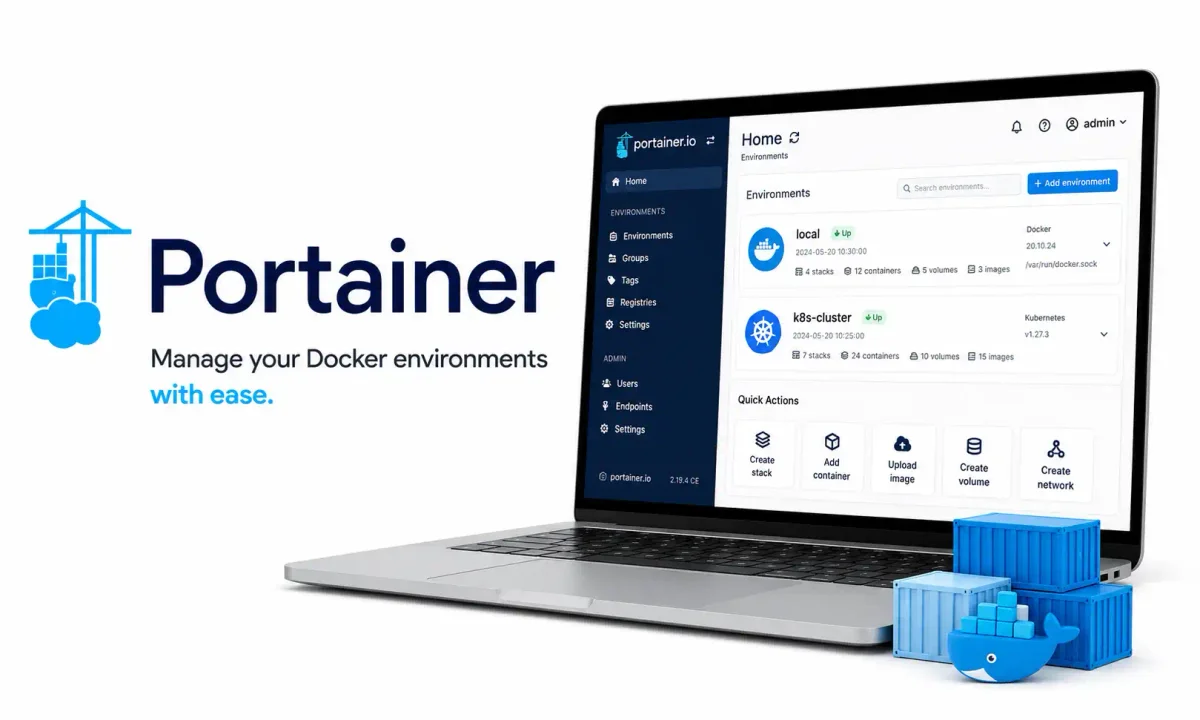
If your home lab has grown past two or three containers, you’ve probably felt the friction of managing everything through raw command-line executions. Checking which container is devouring your system memory, restarting a stuck database service, or pruning dangling images all require SSHing into the host and remembering the exact sequence of terminal flags.
Portainer fundamentally changes this workflow. It replaces terminal tedium with a sleek, web-based management dashboard. It allows you to start, stop, and inspect containers, deploy complex multi-container application stacks, manage isolated storage volumes, and monitor CPU/RAM usage in real time—all from the comfort of your web browser.
I deploy Portainer on almost every Linux VPS and home lab server I build. It is free for personal use (the Community Edition), open-source, and fittingly, it runs as just another Docker container itself. It plugs right into your existing infrastructure without requiring complex dependencies.
In this deep-dive guide, we will cover how Portainer’s architecture works, walk through deploying it via Docker Compose, demonstrate how to connect to remote Docker nodes using the Portainer Agent, and explain how to lock down the dashboard behind a secure reverse proxy to protect your server.
Quick Answer: What is Portainer?
Portainer is a lightweight management UI that allows you to easily build and manage containerized applications in Docker, Docker Swarm, and Kubernetes environments. It acts as a graphical wrapper around the Docker API, giving you visual tools to pull images, manage networks, and deploy docker-compose.yml stacks without needing to type a single CLI command.
How Portainer Architecture Works
A common misconception is that Portainer replaces the underlying Docker engine. It does not. Portainer sits alongside your existing container engine as a management and orchestration layer.
When you install Portainer, you grant it access to the host’s Docker socket (/var/run/docker.sock). This socket is how the Docker daemon listens for API requests. Portainer reads from this socket to gain total visibility into every container, image, and network the engine manages. Any action you take in the Portainer UI is translated into the exact same Docker API calls that the standard docker CLI would make. Your containers will behave exactly as they did before; you are simply interacting with them via a graphical interface.
Because Portainer stores its own configuration (user accounts, connected environments, custom templates) in a dedicated local SQLite database volume, it is completely decoupled from your workloads. If you accidentally delete the Portainer container, the rest of your secure Docker containers will continue running uninterrupted.
Core Capabilities
- Full Stack Deployment: Paste a
docker-compose.ymlfile directly into the browser to deploy complex applications like a Nextcloud instance or a Jellyfin media server. - Multi-Environment Management (Edge Compute): Portainer organizes infrastructure into “Environments.” A single Docker host counts as one environment, but you can deploy the Portainer Agent on a dozen remote servers (like a cheap Hetzner VPS) to manage them all from a single pane of glass.
- Granular Role-Based Access (RBAC): Create multiple user accounts with different permission levels, assigning read-only access to junior developers while retaining full admin control.
- Resource Monitoring: Displays live CPU, memory, and network throughput charts per container without needing a heavy external monitoring stack like Prometheus or Grafana.
System Prerequisites
Portainer is incredibly lightweight. The system overhead comes from the applications it manages, not the dashboard itself.
- CPU: A single processing core is more than enough for the dashboard and its REST API.
- RAM: 512 MB of system memory is sufficient to run Portainer. For a detailed breakdown of server memory, read how Linux memory management works.
- Storage: Less than 200 MB of disk space is required for the application image and its persistent data volume.
- Host OS: Any server running Debian, Ubuntu, or Alpine Linux. It runs perfectly within a Proxmox VE Virtual Machine.
- Dependencies: Docker and Docker Compose must already be installed. If you haven’t set up Docker yet, read our guide on installing Docker on Ubuntu.
Step-by-Step Portainer Installation
To deploy Portainer cleanly, we will use a Docker Compose stack. This ensures the configuration is reproducible and easily backed up.
First, create a dedicated directory on your host:
mkdir -p ~/docker-stacks/portainer
cd ~/docker-stacks/portainer
Create the deployment file:
nano docker-compose.ymlPaste the following YAML configuration:
version: "3.8"

services:
  portainer:
    container_name: portainer
    image: portainer/portainer-ce:latest
    restart: unless-stopped
    security_opt:
      - no-new-privileges:true
    volumes:
      - portainer_data:/data
      - /var/run/docker.sock:/var/run/docker.sock:ro
    ports:
      - 8000:8000
      - 9443:9443

volumes:
  portainer_data:
Deconstructing the Compose Configuration
portainer_datavolume: This is the persistent storage where Portainer keeps its internal database, user credentials, and stack definitions./var/run/docker.sockmount: This line mounts the host’s Docker socket into the container. This is a massive security privilege. Portainer effectively has root-level control over Docker on this host. Treat access to Portainer with the same paranoia you would give an OpenSSH server. The:roflag ensures it is mounted read-only where possible, though managing containers still requires write access via the API.- Port
9443: This exposes the web dashboard over HTTPS. Out of the box, Portainer generates a self-signed TLS certificate. We will place this behind a proper reverse proxy with a real Let’s Encrypt certificate later. - Port
8000: This port is used for the Edge Agent infrastructure. It allows remote Portainer Agents to dial back into the main dashboard to receive configuration updates.
Deploy the stack by running:
sudo docker compose up -dVerify that the container initialized correctly by checking the logs:
sudo docker compose logs -fInitial Setup & Bootstrapping the Environment
Once the container is running, it is time to initialize the administrator account.
- Open your web browser and navigate to
https://<YOUR_SERVER_IP>:9443. - Your browser will aggressively warn you about an invalid or self-signed SSL certificate. This is expected. Click Advanced and choose to proceed.
- You will be greeted by the Portainer setup screen. Create your administrator account with a strong, unique password generated by Vaultwarden or KeepassXC.
- Important Note: For security reasons, if you do not complete this admin account setup within 5 minutes of the container starting, Portainer will automatically lock the web interface. If this happens, simply restart the container (
sudo docker compose restart portainer) to reopen the setup window. - Click Get Started. Portainer will automatically detect the local Docker socket we mounted and create your first “Environment” named
local.
When you click on the local environment, you will land on the primary dashboard overview. You will instantly see a breakdown of every container, image, volume, and network currently running on your host—even the containers you deployed weeks before installing Portainer.
Deploying Stacks (Docker Compose) from the UI
One of Portainer’s greatest strengths is its built-in stack editor. You no longer need to manually create folders and files over SSH; you can deploy full applications right from the web browser.
Let’s say you want to deploy Uptime Kuma to monitor your other services.
- On the left sidebar, click Stacks, then click the Add stack button.
- Give the stack a name (e.g.,
uptime-kuma). - In the web editor window, paste your
docker-compose.ymlconfiguration. - (Optional) If you have a
.envfile containing secrets, you can define them under the Environment variables section below the editor. - Click Deploy the stack.
Portainer handles the API calls in the background, pulls the images from Docker Hub, creates the necessary bridge networks, and spins up the containers. If you ever need to update the stack (for instance, changing an image tag or adding a new database volume), simply click on the stack, edit the YAML directly in the browser, and click Update the stack.
Advanced Multi-Host Management with Portainer Agent
If your home lab spans multiple physical machines—such as a primary server, a Pi-hole running on a Raspberry Pi, and a remote cloud VPS—you can manage them all from your single primary Portainer dashboard.
To do this, you deploy a lightweight container called the Portainer Agent on the remote machines.
On your remote server, run the following stack:
version: '3.8'
services:
  portainer_agent:
    container_name: portainer_agent
    image: portainer/agent:latest
    restart: always
    volumes:
      - /var/run/docker.sock:/var/run/docker.sock
      - /var/lib/docker/volumes:/var/lib/docker/volumes
    ports:
      - 9001:9001
Once the agent is running on the remote server:
- Go back to your primary Portainer dashboard.
- Click Environments on the left sidebar, then click Add environment.
- Select Docker Standalone.
- Choose the Agent connection method.
- Enter a name for the remote server and provide its IP address followed by port
9001(e.g.,192.168.1.50:9001). - Click Connect.
You can now use the dropdown menu at the top of the Portainer UI to seamlessly switch between managing your local server and your remote servers.
Securing Portainer Behind a Reverse Proxy
Because Portainer has absolute control over your Docker host, exposing port 9443 directly to the open internet is extremely dangerous. It must be locked down.
The standard best practice is to place the dashboard behind a reverse proxy like Nginx Proxy Manager, Caddy, or Traefik.
- Deploy your reverse proxy on the same Docker host (or use a dedicated network appliance like pfSense/OPNsense).
- Create a new proxy host routing (e.g.,
portainer.homelab.local). - Forward the traffic to your server’s internal IP on port
9443. Ensure the proxy scheme is set to HTTPS (since Portainer expects TLS). - Use the reverse proxy to generate a valid Let’s Encrypt SSL certificate.
For maximum security, do not map a public domain name to Portainer. Instead, only allow access to the dashboard from within your local LAN, or require an authenticated Tailscale or WireGuard VPN connection to access it remotely.
You should further harden the host operating system by configuring a strict UFW Firewall ruleset and setting up Fail2ban to block brute-force SSH attempts. A robust home server security checklist is mandatory when hosting management tools.
Backing Up Your Portainer Configuration
Portainer’s local database (stored in the portainer_data volume) contains your user accounts, environment connections, and the raw text of the Stacks you deployed through the UI.
Important: Portainer does not back up the data volumes of the containers it manages. For instance, if you deploy Paperless-ngx via Portainer, you must use a tool like Restic or BorgBackup to snapshot the Paperless document volume separately.
To back up Portainer’s configuration, you can use the built-in backup utility (found under Settings > Backup), or you can automate it with a bash script and a Crontab schedule:
#!/bin/bash
# Backup Portainer Volume
BACKUP_DIR="/mnt/backups/portainer"
TIMESTAMP=$(date +%F)
mkdir -p "$BACKUP_DIR"

# Temporarily stop Portainer to prevent database locks
sudo docker stop portainer

# Archive the volume data
sudo docker run --rm -v portainer_data:/data -v "$BACKUP_DIR":/backup alpine \
  tar -czf "/backup/portainer_$TIMESTAMP.tar.gz" -C /data .

# Restart Portainer
sudo docker start portainer

# Delete backups older than 14 days
find "$BACKUP_DIR" -type f -name "portainer_*.tar.gz" -mtime +14 -delete
This ensures that if your server SSD dies, you can reinstall Portainer on a new machine, restore the volume archive, and immediately have your entire management dashboard restored. For a complete overview of disaster recovery, read our self-hosted backup strategies guide.
Alternatives to Portainer
The self-hosted management space has grown rapidly. Depending on your needs, you might prefer a different tool:
- Dockge: Created by the developer of Uptime Kuma, Dockge is a heavily compose-focused, single-host alternative. If you only care about writing and managing
docker-compose.ymlfiles and don’t need multi-host or Kubernetes support, Dockge offers a much cleaner, streamlined UI. - Yacht: A simplified container management interface designed heavily for home server enthusiasts. It features a “template” deployment system similar to Unraid, making it easier for complete beginners to install software with one click.
- Coolify / DokPloy / CapRover: These are full Platform-as-a-Service (PaaS) solutions. They do much more than manage existing containers; they can build applications directly from a Git repository using tools like Nixpacks. We cover this extensively in our Coolify Setup Guide and DokPloy Setup Guide.
Conclusion
Portainer turns Docker management from a terminal-only chore into an accessible, visual experience. By providing a clean interface to inspect container logs, monitor resource spikes, and deploy complex stacks, it bridges the gap between raw command-line administration and modern DevOps workflows.
When paired with a properly restricted reverse proxy, an authenticated VPN, and automated database backups, Portainer becomes the command center that ties your entire self-hosted infrastructure together safely.
Want to dive deeper into container orchestration? Check out our guides on deploying an n8n Automation Engine or setting up a Syncthing cluster for private file sync.
Official Documentation
For troubleshooting, advanced API configurations, and enterprise updates, refer to these official resources:
- Portainer Official Website: https://www.portainer.io/
- Portainer Documentation: https://docs.portainer.io/
- Portainer GitHub Repository: https://github.com/portainer/portainer
- Docker Official Documentation: https://docs.docker.com/
- Docker Compose Reference: https://docs.docker.com/compose/
Frequently Asked Questions
What exactly is Portainer used for?
Portainer is a centralized, web-based management user interface for Docker. It allows you to deploy, monitor, and manage containers, images, persistent volumes, and bridge networks through a graphical dashboard rather than memorizing complex command-line arguments.
Is Portainer free to use?
Yes. The Portainer Community Edition (CE) is completely free and open-source. There is also a paid Business Edition (BE) available that includes enterprise features like registry management and advanced role-based access control, but CE is more than sufficient for home labs.
Can Portainer manage multiple remote Docker hosts?
Absolutely. By deploying the lightweight Portainer Agent container on your additional remote Docker servers, you can connect them all back to your primary Portainer dashboard. This allows you to manage dozens of servers from a single login screen.
What is the difference between Portainer and Dockge?
Portainer is a massive, full-featured management platform capable of overseeing multiple hosts, Kubernetes clusters, and Docker Swarm environments. Dockge is a much smaller, single-host tool specifically designed to make writing and managing raw docker-compose.yml files easier, with a cleaner UI focused solely on stacks.
Does Portainer replace Docker Compose?
No. Portainer actually utilizes Docker Compose under the hood for its “Stacks” feature. When you deploy a stack in the Portainer UI, Portainer is essentially running docker-compose up behind the scenes to orchestrate the containers based on your YAML file.
How do I update Portainer itself to a newer version?
To update Portainer, you must pull the latest image and recreate the container. Stop the current container, run docker rm portainer, then pull the latest image (docker pull portainer/portainer-ce:latest), and finally, recreate the container using your original docker-compose.yml file. Because your data is stored in a separate persistent volume, your settings will remain intact.
Is it safe to expose Portainer to the internet?
It is extremely risky to expose Portainer (port 9443) directly to the open internet. Portainer has root-level access to the Docker socket on your server. If an attacker gains access to Portainer, they completely control the host machine. Always place it behind a reverse proxy, restrict access to local IPs, or require a VPN connection like Tailscale.
Why does my browser show a security warning when accessing Portainer?
By default, Portainer generates a self-signed TLS certificate to ensure the connection is encrypted out of the box. Web browsers do not recognize self-signed certificates as trusted. You can safely bypass this warning for local access, or configure a reverse proxy to serve a trusted Let’s Encrypt certificate instead.
Where does Portainer save my deployed Stacks?
Portainer stores the YAML definitions of any stacks you create through the UI inside its internal database within the portainer_data persistent volume. This is why it is critical to back up this volume; if it is deleted, you will lose the definitions of your deployed stacks.
Why do some of my containers say “Limited” in the Portainer UI?
If a container was created outside of Portainer using the CLI, and Portainer cannot locate the original docker-compose.yml file that spawned it, it will mark the stack as “Limited.” This means Portainer can monitor the containers but cannot fully edit the stack deployment through the web UI.


Discussion
Loading comments...