

In the complex world of modern Open-Source Intelligence (OSINT) gathering, the biggest challenge facing intelligence analysts is not access to data; it is the fundamental challenge of scaling.
If you are investigating a single domain name, you might need to manually query WHOIS records, extract hidden subdomains, scan DNS configurations, check for historical email leaks, look up SSL Certificate Transparency logs, and query specialized port scanning engines.
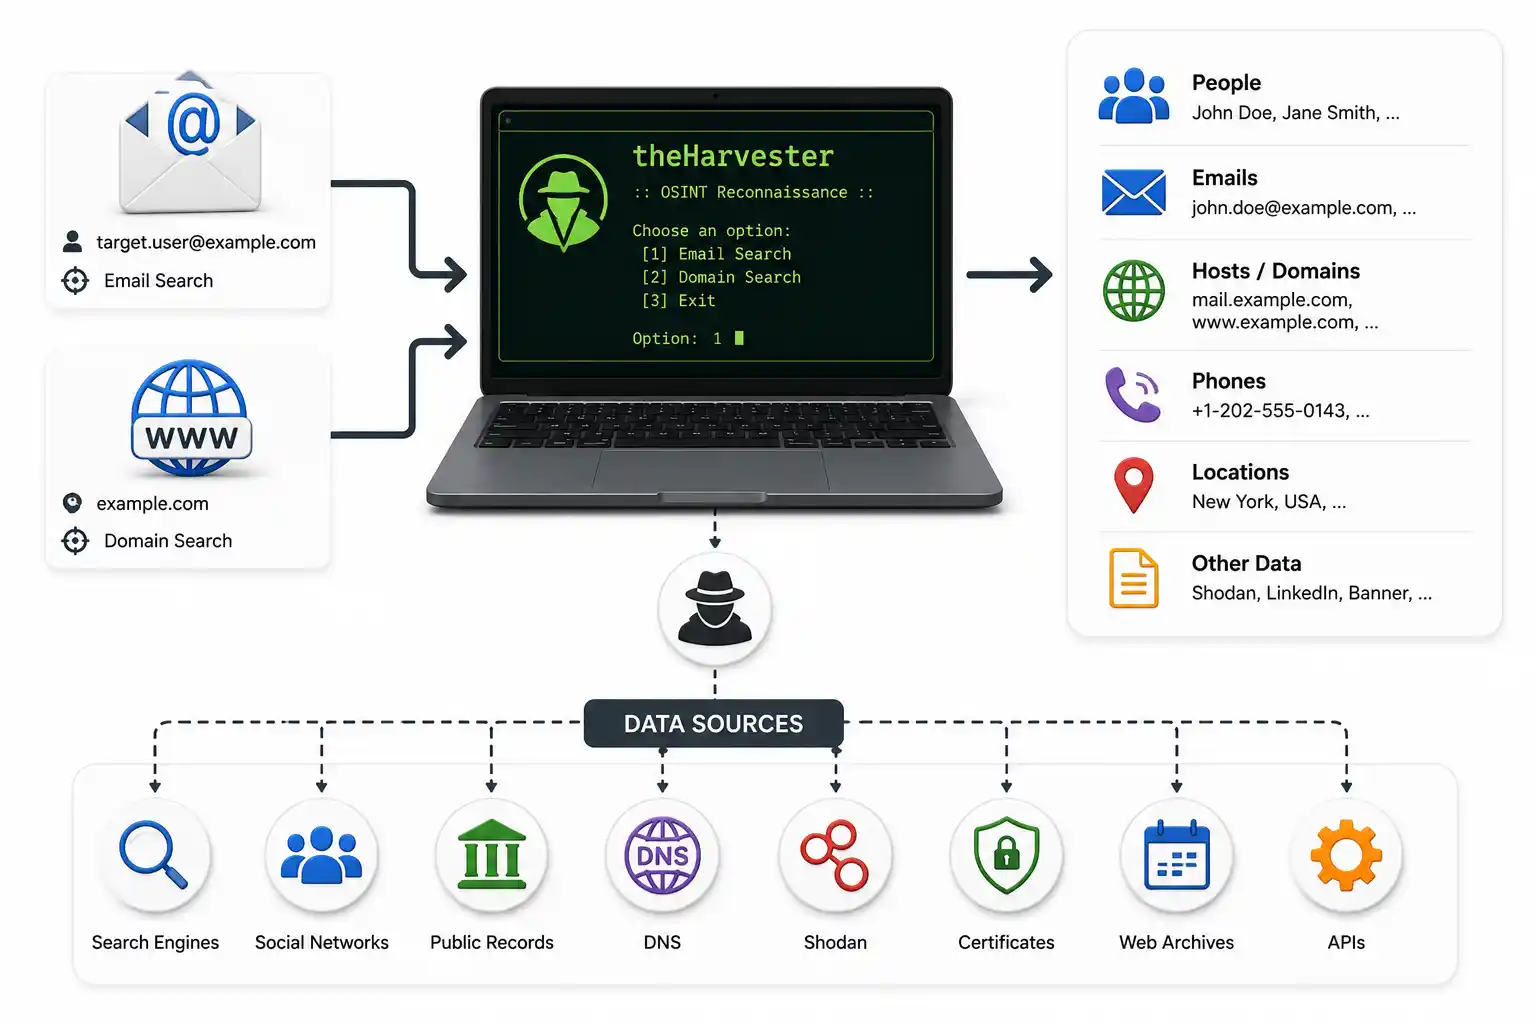
Performing these tasks manually using separate CLI tools like theHarvester or specific web-based search portals like Shodan is feasible for investigating small, single targets. However, it becomes impractical when you are tasked with auditing sprawling corporate networks, multi-national supply chains, or cybercriminal syndicates controlling thousands of distinct domains and IP subnets.
To perform reconnaissance efficiently and effectively at scale, you must abandon manual methodologies and embrace automation.
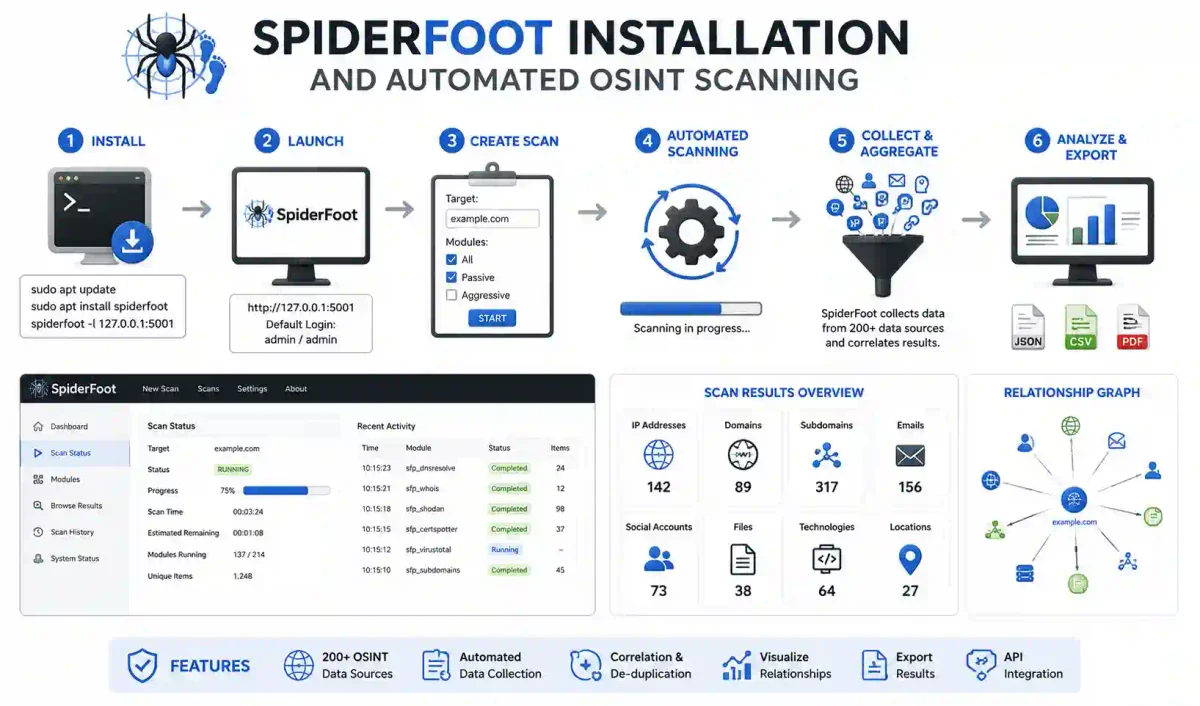
This is where SpiderFoot enters the arena. SpiderFoot is recognized as an advanced, open-source OSINT automation engine. It integrates directly with over 100 public data sources, allowing you to automate the simultaneous collection of DNS records, subdomains, server locations, leaked credentials, netblocks, and threat intelligence blacklists from a single, unified interface.
In this tutorial, we will cover the installation of SpiderFoot from source, analyze module configurations, integrate third-party API keys, execute automated scans, and learn how to analyze your scan reports.
1. The Core Architecture: What is SpiderFoot?
SpiderFoot is a reconnaissance tool written in Python. You simply feed it a target indicator—such as an IP address, a domain name, an email address, a username, a /24 subnet, or a global ASN (Autonomous System Number)—and SpiderFoot automatically queries its internal modules to gather hundreds of related data points.
Unlike basic CLI tools that print blocks of text outputs directly to the terminal, SpiderFoot features a clean local web-based Graphical User Interface (GUI). This interface visualizes your target’s digital footprint, logs relationship linkages, builds node-based relational graphs, and easily exports raw data into spreadsheets or external link analysis tools.
2. Setup & Installation Procedures
SpiderFoot can be installed natively on Windows, macOS, and Linux. However, running such a network querying tool inside an isolated virtual machine is recommended for maximum operational security (OPSEC) and system stability.
Step 1: Install Critical Dependencies
Because SpiderFoot relies on Python 3, specific build essentials and C libraries are required to compile the Python packages it needs for network packet parsing. On any Debian/Ubuntu-based system, install these dependencies first before proceeding:
# Update your local package lists
sudo apt update

# Install git, python3, virtual environment tools, and the required libxml packages
sudo apt install -y git python3 python3-pip python3-venv libxml2-dev libxslt-dev
Step 2: Install SpiderFoot Directly from GitHub (The Master Branch)
To ensure you get the latest version, clone the official GitHub repository and set up a Python virtual environment:
# 1. Clone the official repository
git clone https://github.com/smicallef/spiderfoot.git

# 2. Navigate into the newly created directory
cd spiderfoot

# 3. Create a Python virtual environment
python3 -m venv venv

# 4. Activate the newly created virtual environment
source venv/bin/activate

# 5. Install the required libraries
pip install -r requirements.txt
Step 3: Run the SpiderFoot Server
SpiderFoot runs as a local web server. To start the server and bind it to your local loopback interface (ensuring no one else on your physical network can access your data):
python3 sf.py -l 127.0.0.1:5001Once started, open your web browser and navigate to http://127.0.0.1:5001. You will see the SpiderFoot Web Interface ready for deployment.
3. Configuring SpiderFoot Modules and Architecture
SpiderFoot uses a modular architecture. Its internal scripts are split into three distinct types:
- sfp_ (SpiderFoot Plugin): These are the core scripts that connect to global REST APIs and remote SQL databases.
- Data Providers: Modules designed to query specialized third-party portals.
- Correlators: Modules that analyze the gathered data in the background to identify high-risk assets and hidden relationships.
API Key Integration (The Secret Weapon)
To unlock SpiderFoot’s full potential, you should integrate API credentials for the global services you use. Without APIs, SpiderFoot is restricted to basic, unauthenticated web scraping.
- In the main Web UI, click on Settings in the top navigation bar.
- Select the API Keys tab.
- Scroll through the list of supported services (such as Shodan, Censys, VirusTotal, Hunter.io, and AbuseIPDB).
- Paste your API keys into the corresponding fields.
- Click Save Changes at the bottom of the page.
For more details on configuring API access for domain and DNS queries, review our website OSINT guide.
4. Executing an Automated Scan
To start a new scan, click on New Scan in the top menu of the Web UI.
┌────────────────────────────────────────────────────────┐
│             NEW SCAN CONFIGURATION                     │
├────────────────────────────────────────────────────────┤
│  Scan Name: Corporate Internal Audit                   │
│  Scan Target: target-domain.com                        │
│                                                        │
│  Scan Case Choices:                                    │
│  [ ] Use Case: All (Gathers everything - Loud)         │
│  [ ] Use Case: Footprint (Detailed asset map)          │
│  [x] Use Case: Passive (Zero direct queries - Safe)    │
│  [ ] Use Case: Investigate (Suspicious host audit)     │
└────────────────────────────────────────────────────────┘- Scan Name: Give the scan a descriptive name for your logs.
- Scan Target: Enter your target indicator (e.g.,
target-domain.comor192.0.2.1). - Choose the Scan Case:
- All: Runs every module. Warning: This performs active port scanning and vulnerability sweeps which are easily detected by the target’s firewall.
- Footprint: Collects subdomains, IP addresses, open TCP ports, and SSL certificates.
- Passive: Queries third-party databases. It does not communicate with the target server, maintaining OpSec. This is the recommended choice for initial audits under the OSINT cycle.
- Investigate: Used when a target IP is suspected of malicious activity; queries global threat intelligence blacklists.
5. Report Analysis: Reading the Results
Once the scan is running, SpiderFoot gathers data in real-time. Click on the scan name to enter the Scan Dashboard.
1. The Data Type View
This view lists all findings grouped by category. You should look for these high-value indicators:
- Account on 3rd Party Website: Discovers target usernames scattered across social networks and forums.
- Email Address - Leaked: Discovers email listings that appear in historical database breaches, pointing to compromised corporate credentials.
- DNS Zone Transfer: Verifies if any misconfigured DNS servers permit zone transfers, which can list hidden subdomains.
- Open TCP Port: Identifies exposed server HTTP headers and vulnerable remote administrative protocols.
2. Node Graph Visualization
Click on the Browse tab and select the Graph view. SpiderFoot maps the relationships between entities visually.
- A central red node represents your target domain.
- Branching green nodes represent discovered subdomains.
- Subdomains branch out further to show their A records (IP addresses) and associated email addresses, allowing you to trace infrastructure connections.
3. Exporting Findings
Once a scan is complete, export the raw data to integrate it into your investigation workflows.
- Click the Export button in the top right corner.
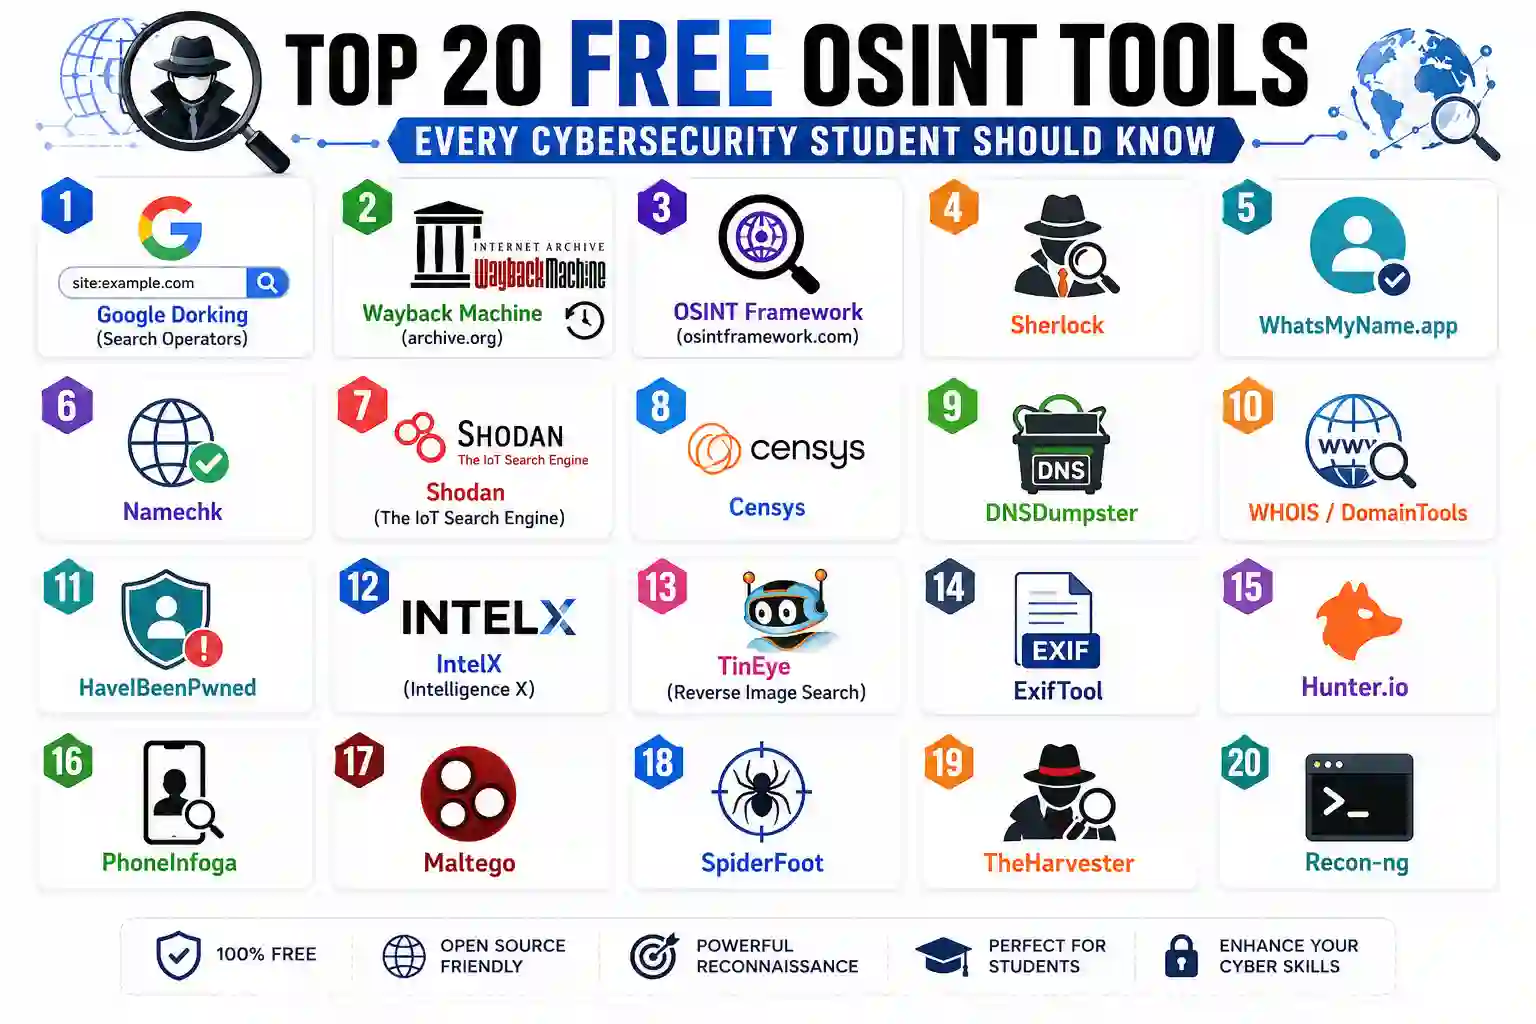
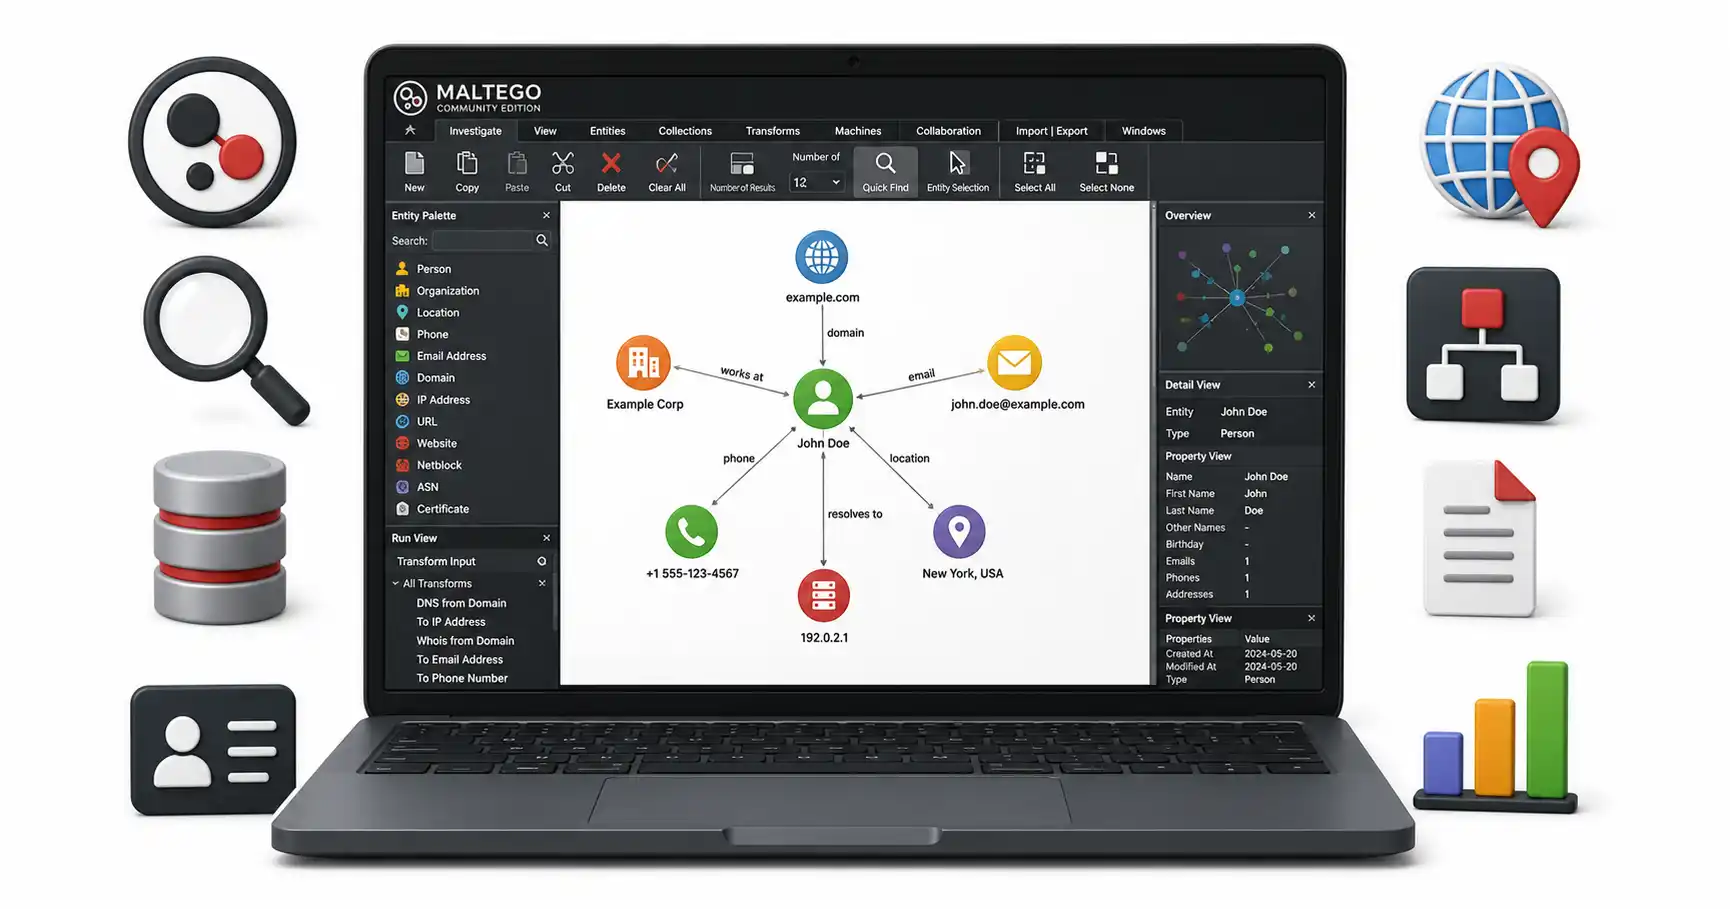
- Select CSV to load the data into a spreadsheet, or select GEXF to import the link relationships into mapping tools like Maltego (as described in our overview of the Top 20 Free OSINT Tools).
6. Module Tuning and Optimization
Running a SpiderFoot scan against a large target can take hours, or even days, if you do not tune the engine correctly.
- Disable Slow Modules: Modules dependent on Web Scraping (like pulling metadata from web pages) are slow. If you only want infrastructure data, disable web scraping modules.
- Timeouts: If a REST API fails, SpiderFoot will hang, waiting for a response. Ensure you configure timeout limits in the Settings menu to force SpiderFoot to abandon slow third-party connections.
Frequently Asked Questions (FAQ)
What is SpiderFoot used for?
SpiderFoot is an automated Open Source Intelligence (OSINT) reconnaissance tool. It is used to query over 100 public data sources simultaneously to gather intelligence on IP addresses, domain names, email addresses, usernames, and subnets.
Is SpiderFoot free to use?
Yes, SpiderFoot HX (the cloud-hosted version) has a premium tier, but the standard open-source version of SpiderFoot is completely free to install and use on your own machine. It is pre-installed on Kali Linux.
Does SpiderFoot perform active or passive scanning?
SpiderFoot is primarily a passive reconnaissance tool, meaning it queries third-party APIs (like Shodan, VirusTotal, or AlienVault) rather than directly interacting with the target. However, it can be configured to perform active scans (like port scanning), so analysts must carefully configure their scan settings.
How do I install SpiderFoot on Windows?
While SpiderFoot is native to Linux, you can run it on Windows by installing Python 3, downloading the SpiderFoot repository from GitHub, installing the required dependencies via pip, and running the sf.py script from the command prompt.
What are SpiderFoot API keys?
SpiderFoot relies on third-party modules to gather data. While many modules are free and open, some (like Shodan, Censys, or Hunter.io) require you to register for a free account and input an API key into SpiderFoot to access their specific data sets.
Conclusion: The Ultimate Force Multiplier
SpiderFoot is a powerful automation tool essential for scaling OSINT audits. By configuring dependencies, adding API credentials for services like Shodan, running passive scan configurations, and visualizing findings via node graphs and export tables, you can map the digital attack surface of any target domain in minutes rather than days.
Always remember to tune your scans, protect your API keys, and never run an active scan without explicit authorization.
Discussion
Loading comments...