

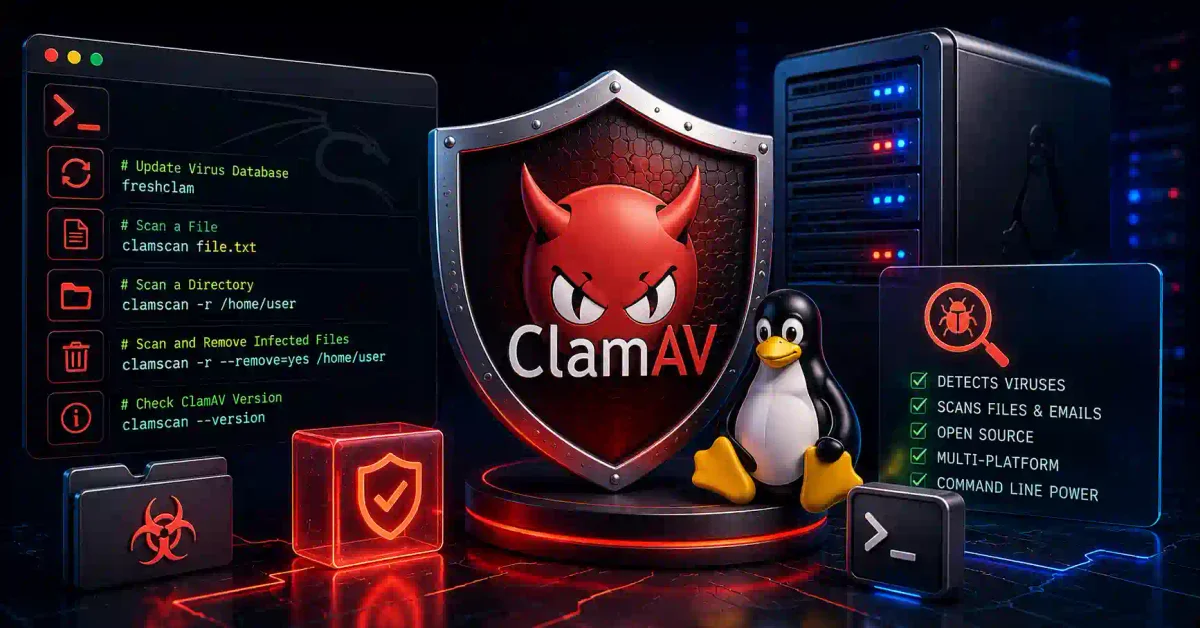
There is a persistent myth in the tech world that Linux servers don’t need antivirus software.
While Linux’s permission model makes it more resilient than traditional desktop operating systems, modern cybercriminals actively target Linux infrastructure. Cloud virtual machines, mail gateways, file-sharing servers, and containerized microservices are top targets for cryptojacking bots, trojans, web shells, and ransomware payloads.
That is where ClamAV (Clam AntiVirus) comes in.
Maintained by Cisco’s Talos intelligence team, ClamAV is the open-source standard for Linux malware detection. It is lightweight, free, multi-threaded, and integrates seamlessly into email servers (Postfix / Sendmail), web upload forms, and central network storage shares.
Deploying ClamAV alongside automated signature updates ensures your Linux servers detect malware payloads before malicious code can execute or spread to network clients.
In this guide, we will walk through installing and configuring ClamAV, updating virus definitions with freshclam, comparing clamscan vs clamdscan, setting up automated cron scans, configuring quarantine directories, tuning daemon parameters, and hardening your server against malware.
⚡ The ClamAV Malware Defense Flow
Here is how ClamAV inspects and neutralizes malicious files on a Linux server:
- File Event / Scheduled Trigger → File uploaded to web server or cron job initiates scan →
- Daemon Memory Lookup →
clamdreceives file path over local Unix socket (/var/run/clamav/clamd.ctl) → - Signature & Heuristic Matching → ClamAV checks file hash against virus definitions updated via
freshclam→ - Verdict & Action → If clean → Process proceeds. If infected → File moved to isolated
/var/log/clamav/quarantine& alert logged
To inspect standard system logs when threats are detected, read our guide on Linux logs explained.
📊 ClamAV CLI & Daemon Comparison Matrix
Here is how the primary ClamAV utility binaries compare across system performance:
| ClamAV Command Tool | Operational Mode | Execution Model | Performance Impact | Primary Ideal Use Case |
|---|---|---|---|---|
clamscan | Standalone CLI Scanner | Loads virus database into RAM on every single invocation | High CPU & Memory startup overhead | One-off manual directory checks or small system audits |
clamdscan | Daemon Client | Sends file paths to running background clamd daemon in RAM | Fast & Lightweight (Zero database reload delay) | High-volume web uploads, mail gateways, and automated cron scans |
freshclam | Signature Updater Daemon | Connects to Cisco Talos mirrors to download updated signatures | Minimal background bandwidth | Running background service for keeping virus definitions fresh |
clamd | Background Daemon Service | Pre-loads multi-gigabyte signature database into system RAM | Requires ~1GB reserved RAM | Production servers requiring instant multi-threaded file scanning |
1. Why Linux Servers Need ClamAV in 2026
Modern Linux environments need malware scanning for three main operational reasons:
1. Preventing Web Shells & Cryptojackers
Web application vulnerabilities (like unvalidated file uploads or remote code execution) allow attackers to drop PHP web shells or XMRig cryptomining scripts into web directories like /var/www/html/uploads. Running ClamAV continuously ensures uploaded files are scanned and quarantined before executing on host processors.
2. File Server & Container Gateway Protection
Linux servers often function as central network hubs running Samba or Nextcloud file shares for Windows and macOS clients. While a Windows .exe trojan cannot execute natively on Linux, storing infected files on shared drives exposes all connected network clients to infection. ClamAV acts as a protective gateway filter.
3. Mail Gateway Filtering (Postfix & Sendmail)
Email remains the #1 vector for malware distribution. Integrating ClamAV with mail transfer agents (MTAs) like Postfix or Sendmail via Amavisd-new allows the mail server to inspect incoming email attachments in real-time, stripping out malicious ZIP, EXE, or macro-enabled Office documents before they reach user inboxes.
4. Regulatory Compliance & Audit Readiness
Modern cybersecurity compliance frameworks (such as HIPAA, PCI-DSS Requirement 5, ISO 27001, and SOC 2 Type II) explicitly require active malware detection and logging mechanisms on all servers processing cardholder or healthcare data:
- Automated Audit Trail: ClamAV logs all file inspection events to
/var/log/clamav/clamav.logor systemd journal logs, providing tamper-evident proof for IT compliance auditors. - Low System Overhead: Runs cleanly in background containers without degrading web server response times.
2. Installing ClamAV on Ubuntu, Debian & RHEL
Installing ClamAV requires fetching both the core scanner engine and the signature updater daemon.
Installing on Ubuntu / Debian
Open your terminal and install clamav along with the daemon service:
sudo apt update
sudo apt install -y clamav clamav-daemon clamav-freshclam
Installing on RHEL, AlmaLinux & Rocky Linux
On Red Hat distributions, enable the EPEL repository first:
sudo dnf install -y epel-release
sudo dnf install -y clamav clamd clamav-update
If you are running on a virtual private server, check out our guide on what is a VPS explained and learn to deploy servers using deploying Node.js on a Linux VPS.
3. Updating Signature Databases with Freshclam
Before running your first malware scan, you must update ClamAV’s virus definition database using freshclam.
Manual & Daemon Signature Updates
Stop the background updater service temporarily so you can execute an initial manual sync:
# Stop freshclam service
sudo systemctl stop clamav-freshclam

# Execute manual signature update
sudo freshclam

# Restart freshclam background updater service
sudo systemctl start clamav-freshclam
The updater downloads three core definition files into /var/lib/clamav/:
main.cvd(Base signature database containing millions of known malware hashes)daily.cvd(Daily threat updates published continuously by Cisco Talos analysts)bytecode.cvd(Heuristic engine scripts designed to analyze dynamic code execution)
Managing Freshclam Configurations in Air-Gapped Networks
In isolated enterprise environments without direct internet access:
- Config File Location:
/etc/clamav/freshclam.conf(Ubuntu/Debian) or/etc/freshclam.conf(RHEL). - Private Mirror Setup: Set
PrivateMirrorto route definition updates through an internal local mirror server. - DNS Database Version Check:
freshclamqueries DNS TXT records (current.cvd.clamav.net) to verify if new database versions are available before starting HTTP downloads, minimizing bandwidth usage!
Advanced Custom YARA Rule Integration
In addition to official Talos signatures, ClamAV allows system administrators to load custom YARA rules (.yar / .yara) into /var/lib/clamav/. This allows security teams to detect proprietary in-house malware, custom web shells, or organization-specific data leaks during routine scans!
4. Running Scans: clamscan vs clamdscan
Understanding the difference between clamscan and clamdscan is crucial for server performance.
1. Manual Scanning with clamscan
clamscan is a standalone tool. Every time you run it, it must load the entire 1GB+ virus database into RAM, taking 15 to 30 seconds before it even begins scanning files!
# Scan a specific directory recursively, displaying infected files only
clamscan -r -i /var/www/html

# Scan home directories and log results to a text file
clamscan -r -i /home --log=/var/log/clamav/scan-results.log
2. High-Speed Scanning with clamdscan
clamdscan relies on the running clamd daemon service. Because clamd keeps the virus database pre-loaded in system RAM, clamdscan begins scanning files instantly:
# Enable and start the clamd daemon
sudo systemctl enable --now clamav-daemon

# Scan directory instantly via clamd daemon
clamdscan -m --fdpass /var/www/html
Tuning clamd.conf Performance Parameters
To optimize memory usage and CPU limits on production servers, edit /etc/clamav/clamd.conf:
- MaxFileSize 100M: Restricts scanning on huge log archives to prevent CPU spikes.
- MaxScanSize 150M: Limits total payload uncompression size.
- ExcludePath ^/proc/ ^/sys/ ^/dev/: Excludes virtual Linux file systems from scanning loops to prevent infinite recursions!
- MaxThreads 10: Controls maximum multi-threaded scan workers to reserve CPU cores for web servers.
3. Real-Time On-Access Protection with clamonacc
On modern Linux systems, ClamAV provides real-time file system monitoring using clamonacc (ClamAV On-Access Scanner). clamonacc utilizes Linux kernel fanotify event hooks to monitor configured directories (such as /var/www/html/uploads), scanning files instantly when created, opened, or modified before execution permissions are granted!
5. Setting Up Automatic Quarantine & Cron Scans
Never leave threat remediation to manual commands. Configure an isolated quarantine directory and schedule daily automated system scans.
Step 1: Create an Isolated Quarantine Directory
Create a restricted directory where ClamAV will automatically move infected files, locking down permissions so non-root users cannot read or execute quarantined payloads:
sudo mkdir -p /var/log/clamav/quarantine
sudo chmod 700 /var/log/clamav/quarantine
sudo chown clamav:clamav /var/log/clamav/quarantine
Step 2: Configure a Daily Cron Script & Email Alerting
Create a daily cron script (/etc/cron.daily/clamav-nightly-scan):
#!/bin/bash
QUARANTINE_DIR="/var/log/clamav/quarantine"
LOG_FILE="/var/log/clamav/daily-scan.log"
TARGET_DIR="/var/www /home /tmp"
ADMIN_EMAIL="[email protected]"

# Execute scan and move infected files to quarantine
clamdscan --multiscan --fdpass --move="$QUARANTINE_DIR" --log="$LOG_FILE" $TARGET_DIR

# Check log for infected detections and email sysadmin if threats found
if grep -q "FOUND" "$LOG_FILE"; then
    echo "MALWARE THREAT DETECTED ON SERVER! Check $LOG_FILE for details." | mail -s "SECURITY ALERT: ClamAV Malware Found on $(hostname)" "$ADMIN_EMAIL"
fi
Make the script executable and test the notification loop:
sudo chmod +x /etc/cron.daily/clamav-nightly-scanGenerate custom cron schedule strings using our interactive Cron Expression Generator or configure systemd timers using our Systemd Service File Generator.
🔒 Hardening Server Infrastructure & Host Defense
Antivirus scanning is only one component of a layered zero-trust security strategy.
Complete Server Hardening Checklist
- Rootkit & Malicious Process Auditing: Pair ClamAV with RKHunter or chkrootkit to detect kernel-level rootkits. Follow our guide on detecting rootkits on Linux.
- Host Firewalls & Packet Filtering: Block unauthorized port scans using UFW or
firewalld. Read our tutorials on UFW firewall guide and firewall security overview. - Automated Intrusion Prevention: Block brute-force SSH attacks using Fail2ban or CrowdSec. Read our step-by-step guides on Fail2ban guide and CrowdSec beginner guide.
- Kernel Access Control (MAC): Lock down application file permissions using AppArmor vs SELinux and review basic permissions in Linux file permissions explained.
- Hardened Ingress Proxying: Protect web applications behind Nginx Proxy Manager, Traefik, or Caddy with SSL certificates. Review our Nginx Proxy Manager security guide and Let’s Encrypt guide. Generate web server configs using our Nginx config generator.
- Zero-Trust Mesh VPN: Connect remote developer laptops and servers securely using Tailscale or WireGuard. Compare options in our Tailscale vs WireGuard comparison and review how a VPN works.
- Secret Management: Protect database connection strings and passwords using Vaultwarden; see our Vaultwarden self-hosted guide and generate strong keys using our password generator. Compare security options in our guides on best password managers, passkeys vs passwords, and SSO guide for 2026. Audit breach risks with check if your password was leaked.
- Container Security & Auditing: Package apps using Docker or Podman (compare in our Docker vs Podman benchmark and installing Docker on Ubuntu). Scan container images for CVEs using Trivy via our securing Docker containers guide. Generate deployment manifests with our Docker Compose generator.
- System Auditing & Host Security: Secure SSH access following our Ubuntu SSH hardening guide, run daily security checks using the top 20 Linux security commands, and audit host compliance with Lynis via our Lynis security audit guide.
🛠️ Self-Hosted Cloud & Microservices Ecosystem
Deploy, test, and manage web applications across modern cloud environments and self-hosted platforms:
- Cloud Infrastructure Alternatives: Compare cloud providers in our AWS vs Azure vs Google Cloud comparison, deploy static frontends via Azure Static Web Apps, or explore free static platforms in how to host a website for free.
- Container Orchestration: Manage container clusters with Kubernetes; see our guide to Kubernetes explained simply.
- Self-Hosted PaaS Panels: Deploy web apps on private VPS instances using Coolify or DokPloy. Read our Coolify self-hosting guide and DokPloy setup guide.
- Visual Management Panels: Monitor Docker containers using Portainer; read our Portainer self-hosted guide.
- Home Lab Infrastructure: Run private hypervisors using Proxmox VE; see our Proxmox home lab setup guide. Back up server configurations using our backup strategies for self-hosted servers, store files in Nextcloud, block ads with Pi-hole, and automate workflows using n8n via Docker Compose.
- Private Local AI Models: Analyze malware threat logs using local LLMs via Ollama and Open WebUI. Read our guide on local AI vs cloud AI, our Ollama Linux installation guide, and Open WebUI setup guide. Connect AI models using the Model Context Protocol (MCP).
- Development Workflows: Build security tools across the software development life cycle (see our SDLC guide for beginners), compare programming languages in Python vs Rust, handle async JavaScript requests, test web security with Burp Suite Community Edition, check suspicious links via how to check if a website is safe, and build OSINT toolkits via building your first OSINT toolkit.
💻 Developer & Sysadmin Web Utilities
Bookmark these interactive web utilities to format data, build cron schedules, and generate server configs:
- Container Setup: Docker Compose Generator
- Reverse Proxy Configs: Nginx Config Generator
- Init Scripts: Systemd Service File Generator
- Data Formatting: JSON Formatter & JSON Validator
- Secret Generation: Password Generator & ENV Generator
- SEO Metadata: Schema Markup Generator
- Expression Testing: Regex Tester
- Linux Learning: Linux Command Explorer & Linux Permission Calculator
- Automation: Cron Expression Generator & Gitignore Generator
📖 Official Documentation & Standards References
- ClamAV Official Documentation: https://docs.clamav.net
- ClamAV GitHub Repository: https://github.com/Cisco-Talos/clamav
- Cisco Talos Intelligence Group: https://talosintelligence.com
- Ubuntu Community ClamAV Guide: https://help.ubuntu.com/community/ClamAV
- NIST Linux Server Hardening Guidelines (SP 800-123): https://csrc.nist.gov/publications/detail/sp/800-123/final
❓ Frequently Asked Questions
What is ClamAV?
ClamAV (Clam AntiVirus) is an open-source, multi-threaded antivirus engine designed for Linux servers and workstations. It detects viruses, trojans, cryptominers, web shells, and malicious email attachments.
Why do Linux servers need an antivirus like ClamAV?
While Linux is inherently secure, Linux servers can host malicious PHP web shells, cryptomining bots, or ransomware. Additionally, Linux file and mail servers can distribute Windows malware to network clients if files are not scanned.
What is the difference between clamscan and clamdscan?
clamscan is a standalone tool that reloads the entire virus database into memory on every run (slow startup). clamdscan sends file paths to a running clamd daemon background service, scanning files instantly with zero startup delay.
How do I update ClamAV virus signatures?
ClamAV uses freshclam to update virus signatures from Cisco Talos mirrors. You can run sudo freshclam manually or enable the clamav-freshclam background service to fetch updates automatically.
Where does ClamAV store virus definitions?
On Ubuntu, Debian, and RHEL systems, ClamAV stores signature database files (main.cvd, daily.cvd, bytecode.cvd) in the /var/lib/clamav/ directory.
Does ClamAV provide real-time file protection?
Yes. On modern Linux systems, ClamAV can be configured with clamonacc (ClamAV On-Access Scanner), which uses Linux kernel fanotify hooks to scan files instantly when created or accessed.
How do I quarantine infected files in ClamAV?
You can use the --move=/path/to/quarantine flag with clamscan or clamdscan to automatically move detected malware files into a restricted, isolated quarantine directory.
Can ClamAV scan compressed archive files (ZIP, TAR, RAR)?
Yes. ClamAV includes built-in archive unwrapping engines that automatically extract and inspect files inside ZIP, TAR, GZ, RAR, and PDF containers.
How much RAM does the ClamAV clamd daemon require?
The clamd daemon pre-loads millions of virus signatures into system memory, requiring approximately 800MB to 1.2GB of dedicated RAM.
How do I integrate ClamAV with a Postfix email server?
You can integrate ClamAV with Postfix or Sendmail using Amavisd-new or ClamSMTP, which pass incoming email attachments to the clamd daemon before delivering emails to inbox folders.

Discussion
Loading comments...