

A few years ago, I hit my 15GB limit on Google Drive. I looked at the upgrade pricing, looked at my growing archive of family photos, and realized I was about to lock myself into a lifetime subscription just to store my own data. Worse, I was paying a massive corporation to scan my private documents and index my calendar.
In 2026, data sovereignty isn’t just a buzzword for enterprises; it’s a critical necessity for anyone who values digital privacy.
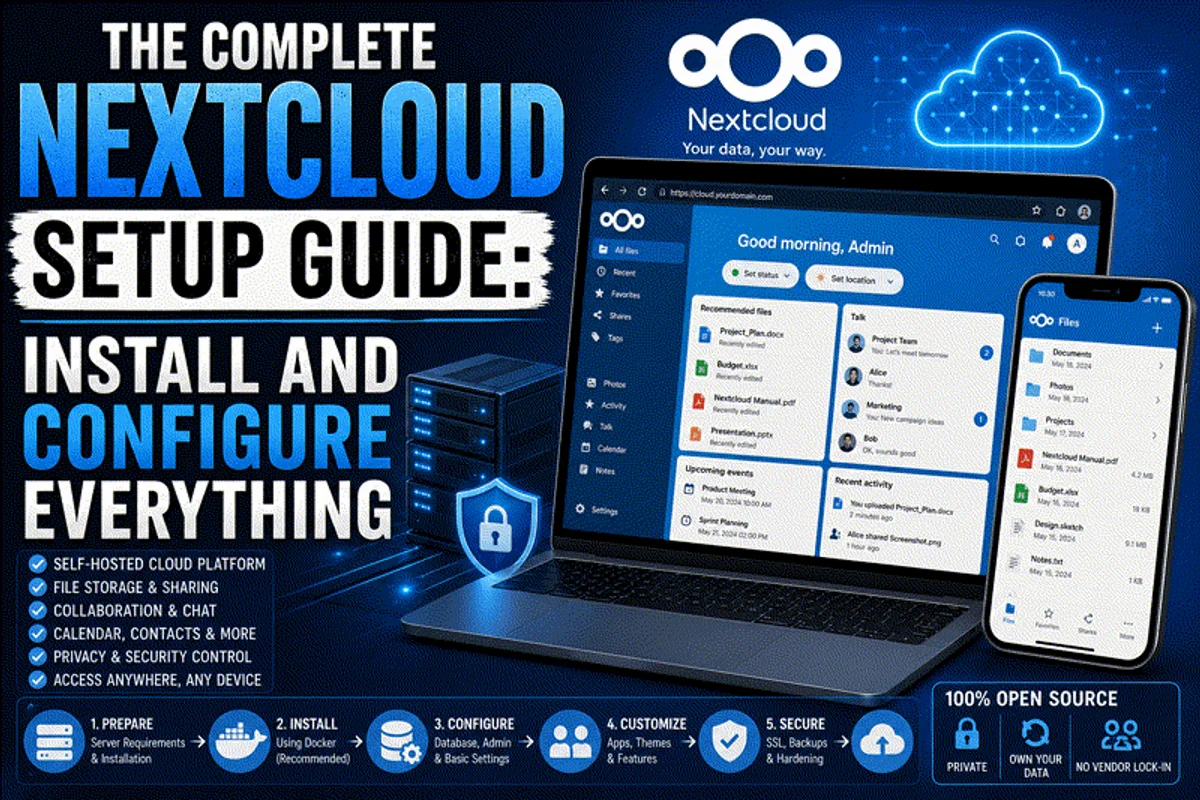
Nextcloud Hub is the ultimate open-source alternative to Big Tech cloud storage. But it’s far more than just a Dropbox clone. Nextcloud functions as a comprehensive, self-hosted productivity ecosystem—offering file sync, collaborative document editing, calendar sync, contact management, and secure video communication.
In this setup guide, I’ll walk you through exactly how I deploy Nextcloud for my own data using Docker Compose. We’ll configure a high-performance MariaDB backend, set up Redis caching to eliminate slow load times, secure the stack with automated SSL certificates, and establish a bulletproof backup routine.
Why Should You Self-Host Nextcloud?
If you’ve spent any time researching the best open source alternatives, you’ve likely seen Nextcloud at the top of every list. Here is why it remains the undisputed king of self-hosted cloud storage:
- Complete Data Ownership: Your files, photos, calendars, and chat logs are stored exclusively on your own server hardware. No one scans your data to train AI models.
- No Arbitrary Storage Limits: Your cloud size is limited only by the hard drives in your VPS server or Proxmox home lab. Need 2TB? Just attach a larger drive. No monthly tier upgrades required.
- Airtight Security: Nextcloud supports server-side encryption, End-to-End Encryption (E2EE) for sensitive folders, brute-force protection, and Multi-Factor Authentication (MFA).
- Vast App Ecosystem: The built-in app store features over 300 extensions to customize your cloud (e.g., GPS tracking, markdown notes, password managers).
While tools like Syncthing are fantastic for pure peer-to-peer file syncing, Nextcloud provides the full web-based “cloud” experience you are accustomed to.
The Nextcloud Stack Architecture
Before we start typing commands, you need to understand what we are actually building. A production-grade Nextcloud deployment isn’t just one application; it’s a stack of interconnected services.
Rather than a complex ASCII diagram, here is how the traffic flows:
- Reverse Proxy (SSL Gateway): A tool like Caddy or Nginx Proxy Manager listens for incoming HTTPS requests on your public domain, decrypts the traffic, and forwards it to Nextcloud.
- Nextcloud Application Container: The core PHP application that processes web logic, handles user authentication, and reads/writes to your actual filesystem.
- Database (MariaDB): Stores all the metadata—including user accounts, sharing permissions, file paths, tags, calendar events, and app configurations.
- Memory Cache (Redis): A fast, in-memory key-value store. Redis is absolutely essential for transactional file locking. Without it, Nextcloud has to query the slower SQL database every time a file is modified, leading to brutal sync speeds and file corruption errors.
System Requirements
Nextcloud is heavy. It is a massive PHP application. Do not try to run this on a $2 micro-VPS with 512MB of RAM; the database will crash during large file uploads.
- CPU: 2 Cores minimum (4+ recommended for Nextcloud Office).
- RAM: 2GB minimum, 4GB highly recommended.
- Storage: Dependent on your file needs, but the OS and containers need at least 20GB of SSD space.
- Software: A Linux server with Docker and Docker Compose. If you need help getting started, read our guide on installing Docker on Ubuntu or explore Docker vs Podman. You might also want Portainer to manage these containers visually later.
If you are renting cloud infrastructure, our comparison of AWS vs Azure vs Google Cloud or standard VPS providers like Hetzner will help you choose a host.
Step-by-Step Installation with Docker Compose
We will deploy Nextcloud using Docker Compose to keep our application, database, and cache cleanly isolated.
1. Create a Project Directory
SSH into your server. (If you haven’t locked down your remote access yet, pause and read how to secure SSH on Ubuntu first).
Create a dedicated folder for your deployment:
mkdir -p ~/nextcloud-server
cd ~/nextcloud-server
2. Craft the Docker Compose File
We need to define our stack. You can generate a basic template using our Docker Compose generator, but for Nextcloud, we need specific performance tweaks.
Create the file:
nano docker-compose.ymlPaste the following configuration:
version: '3.8'

services:
  db:
    image: mariadb:10.11
    container_name: nextcloud-db
    restart: always
    command: --transaction-isolation=READ-COMMITTED --log-bin=ROW --innodb_read_only_compressed=OFF
    volumes:
      - ./db_data:/var/lib/mysql
    environment:
      - MYSQL_ROOT_PASSWORD=your_secure_root_password
      - MYSQL_DATABASE=nextcloud
      - MYSQL_USER=nextcloud
      - MYSQL_PASSWORD=your_secure_db_password
    security_opt:
      - no-new-privileges:true

  redis:
    image: redis:alpine
    container_name: nextcloud-redis
    restart: always
    security_opt:
      - no-new-privileges:true

  app:
    image: nextcloud:production
    container_name: nextcloud-app
    restart: always
    ports:
      - "127.0.0.1:8080:80"
    depends_on:
      - db
      - redis
    volumes:
      - ./nextcloud_data:/var/www/html
    environment:
      - MYSQL_HOST=db
      - MYSQL_DATABASE=nextcloud
      - MYSQL_USER=nextcloud
      - MYSQL_PASSWORD=your_secure_db_password
      - REDIS_HOST=redis
      - NEXTCLOUD_TRUSTED_DOMAINS=cloud.yourdomain.com
      - PHP_MEMORY_LIMIT=512M
      - PHP_UPLOAD_LIMIT=10G
Note: Replace your_secure_db_password with actual strong passwords. Use our password generator if needed.
3. Deconstructing the Configuration
- The Database Commands: We use MariaDB 10.11 (an LTS release). The
transaction-isolation=READ-COMMITTEDparameter is a strict performance requirement from the Nextcloud documentation to prevent database deadlocks. - The Application Port: Notice we mapped
"127.0.0.1:8080:80". This binds Nextcloud only to the localhost. We don’t want it exposed to the raw internet until it passes through our secure reverse proxy. - Trusted Domains: Nextcloud has built-in spoofing protection. It will reject any HTTP requests that don’t match the domain specified in
NEXTCLOUD_TRUSTED_DOMAINS. (If you are curious about how domains resolve to your server, read our guide on what happens when you type a URL).
4. Start the Stack
Bring the containers online:
docker compose up -dVerify everything started cleanly by checking the Linux system logs:
docker compose logs -fConfiguring the Reverse Proxy
Because browsers enforce strict security for web applications, you must access Nextcloud over HTTPS.
If you are using a PaaS like Coolify or Dokploy, they handle this automatically. But since we are doing this manually, we need a reverse proxy.
I highly recommend Caddy (check out our Caddy web server guide for details) because it automatically handles Let’s Encrypt TLS certificates.
If you prefer Nginx, you can use our Nginx config generator, but here is the much simpler Caddy configuration.
Create a Caddyfile:
cloud.yourdomain.com {
    # Route traffic to the Nextcloud container
    reverse_proxy 127.0.0.1:8080 {
        # Increase the connection timeout for large file uploads
        transport http {
            read_buffer_size 4096
        }
    }

    # Nextcloud service discovery redirects for CardDAV / CalDAV clients
    redir /.well-known/carddav /remote.php/dav/ 301
    redir /.well-known/caldav /remote.php/dav/ 301

    # Security configuration headers
    header {
        Strict-Transport-Security "max-age=15552000; includeSubDomains; preload"
        X-Content-Type-Options "nosniff"
        X-Frame-Options "SAMEORIGIN"
        Referrer-Policy "no-referrer"
    }
}
Start your Caddy server. Ensure your domain’s A Record points to your server’s IP (if you need a refresher, read what is DNS).
Before proceeding, configure your UFW firewall to allow ports 80 and 443, but block port 8080. You can verify your firewall rules using standard Linux security commands.
Initial Web Setup
- Open your browser and navigate to
https://cloud.yourdomain.com. - You will be greeted by the Nextcloud initialization screen.
- Create your administrative user account by entering a username and a strong master password.
- Click Install.
Nextcloud will spend a few minutes building the database tables and populating the default directory structures. Grab a coffee. (If you’re using this same master password everywhere, you should probably check if your password has been leaked).
Post-Installation Performance Tuning (Crucial)
If you navigate to Administration Settings > Overview, you will likely see a wall of yellow and red warnings. Nextcloud is notorious for requiring manual tuning after the initial install. Let’s fix the two most critical issues.
1. Fix the Background Jobs (Cron)
By default, Nextcloud runs background tasks (like file cleanup and thumbnail generation) using AJAX. This means tasks only execute when a user is actively clicking around the web interface. If no one logs in for a week, background tasks pile up and crash the server upon the next login.
We need to use the host system’s cron to trigger these tasks reliably.
Open your server’s crontab:
sudo crontab -eAdd this line to trigger the Nextcloud cron.php script inside the container every 5 minutes:
*/5 * * * * docker exec -u www-data nextcloud-app php -f /var/www/html/cron.phpBack in the Nextcloud Web UI, navigate to Administration Settings > Basic Settings, and change the “Background jobs” setting from AJAX to Cron.
2. Force Redis Memory Caching
Even though we spun up a Redis container, Nextcloud won’t use it until we explicitly tell it to in the configuration file.
Edit your local config.php:
sudo nano ./nextcloud_data/config/config.phpFind the bottom of the file (just before the closing );) and append these cache directives:
  'memcache.local' => '\OC\Memcache\APCu',
  'memcache.locking' => '\OC\Memcache\Redis',
  'redis' => array(
    'host' => 'redis',
    'port' => 6379,
    'timeout' => 0.0,
  ),
Save and exit. This single change will make your Nextcloud instance feel 10x faster when browsing folders, and completely eliminates the dreaded “file is locked” errors during large syncs.
Setting Up Nextcloud on Mobile and Desktop
The real magic of a self-hosted cloud is seamless synchronization across all your devices.
Mobile Apps (iOS and Android)
The official Nextcloud mobile apps are free.
- Download the app and tap “Log in with a device.”
- Enter your secure URL (
https://cloud.yourdomain.com). - Authorize the device.
- Pro Tip: Enable “Auto Upload” in the app settings. Every time you take a photo on your phone, it will instantly back up to your server—completely replacing the need for iCloud or Google Photos. (If you want a dedicated photo management app, you can run Immich alongside Nextcloud).
Desktop Sync Client (Windows / macOS / Linux)
Download the Nextcloud Desktop client. Once connected, it runs silently in your system tray, syncing your local folders with your server.
Use Virtual File System (VFS): If you have 1TB of data on your server but only a 256GB SSD in your laptop, enable VFS mode. It displays all your cloud files in your local file explorer as if they were there, but only actually downloads the data when you double-click a file. It saves massive amounts of local disk space.
Hardening Security: Two-Factor Authentication (2FA)
Since your personal files are now exposed to the internet, enforcing 2FA is absolutely mandatory.
- Go to the Nextcloud App Store (click your profile icon → Apps).
- Search for and enable the “Two-Factor TOTP Provider” app.
- Go to Personal Settings → Security and toggle TOTP on.
- Scan the QR code with your authenticator app (I highly recommend storing these in a self-hosted Vaultwarden instance).
What about the Desktop Client?
Once 2FA is enabled, your standard password will no longer work for desktop or mobile sync clients. You must generate dedicated App Passwords. Under Personal Settings → Security, scroll down to Devices & Sessions. Create a new app password, name it “MacBook Sync”, and paste that generated password into the desktop application.
You should also integrate Fail2ban on your host server to automatically ban IP addresses that repeatedly fail to log in to your Nextcloud instance. If you want to audit your entire setup, follow our secure home server checklist.
The Automated Backup Strategy
Self-hosting means nobody is coming to save you if your server catches fire. You are your own IT department.
A proper Nextcloud backup requires saving both the database (metadata) and the actual files. If you only backup the files, Nextcloud won’t know who owns them or how they were shared.
Here is a robust bash script to handle the backup safely:
#!/bin/bash
PROJECT_DIR="/home/suresh/nextcloud-server"
DATA_DIR="$PROJECT_DIR/nextcloud_data"
BACKUP_DIR="/var/backups/nextcloud"
TIMESTAMP=$(date +%Y%m%d_%H%M%S)

mkdir -p "$BACKUP_DIR"

# Ensure proper permissions
# (Check out our [Linux file permissions explained](/blog/linux/linux-file-permissions-explained) guide and use our [permission calculator](/tools/linux-permission-calculator) if you are unsure)

echo "Setting Nextcloud to maintenance mode..."
docker exec -u www-data nextcloud-app php occ maintenance:mode --on

echo "Dumping database..."
docker exec nextcloud-db mysqldump --single-transaction -unextcloud -pyour_secure_db_password nextcloud > "$BACKUP_DIR/db_$TIMESTAMP.sql"

echo "Archiving files (this may take a while)..."
tar -czf "$BACKUP_DIR/files_$TIMESTAMP.tar.gz" -C "$DATA_DIR" config/ data/

echo "Disabling maintenance mode..."
docker exec -u www-data nextcloud-app php occ maintenance:mode --off

# Remove backups older than 7 days
find "$BACKUP_DIR" -type f -mtime +7 -exec rm {} \;
You should run this script nightly using a systemd timer or cron.
Once the backup archives are created locally, use a tool to push them to an offsite location. If you need a comprehensive strategy, read our guide on backup strategies for self-hosted servers. You can also use SFTP to manually pull them down to a local NAS (see our FTP/SFTP file transfer guide).
Final Thoughts
Building a Nextcloud server is a rite of passage for anyone getting into the self-hosted ecosystem. It replaces dozens of proprietary subscriptions with a single, privacy-respecting platform that you control completely.
Once you have Nextcloud running smoothly, you can start expanding your home lab. You can set up Paperless-ngx to digitize your physical documents, configure a Pi-hole to block ads network-wide, deploy a Jellyfin media server for your movies, automate tasks with n8n, and deploy Uptime Kuma to monitor all your new services. If you keep all your configuration in source control, our Git and GitHub guide can help you track changes to your docker-compose.yml files.
If you ever receive an unexpected link related to your server from an unknown sender, always use our guide to check a website before clicking a link. Security is a continuous process.
Official Documentation
- Nextcloud Website: https://nextcloud.com
- Nextcloud Admin Manual: https://docs.nextcloud.com/server/latest/admin_manual/
- Nextcloud Docker Repository: https://github.com/nextcloud/docker
- Nextcloud Apps Store: https://apps.nextcloud.com/
Frequently Asked Questions (FAQ)
What is Nextcloud?
Nextcloud is an open-source, self-hosted suite of client-server software for creating and using file hosting services. It provides functionality similar to Google Drive or Dropbox, but allows you to retain complete ownership and control over your data.
Is Nextcloud completely free?
Yes. The Nextcloud server software and its mobile/desktop sync clients are 100% free and open-source. You only need to pay for the underlying server infrastructure (like a VPS or physical hardware) to host it.
Do I need Redis for Nextcloud?
While Nextcloud can technically run without Redis, it is highly discouraged for production environments. Redis acts as a memory cache for file locking. Without it, Nextcloud relies on the database for file locks, which causes severe performance bottlenecks and synchronization errors.
Can I access Nextcloud from my smartphone?
Yes. Nextcloud has official mobile applications for iOS and Android. You can download them from the App Store or Google Play Store. The apps support auto-uploading photos, allowing you to back up your phone’s camera roll to your server automatically.
Can I edit Microsoft Office documents inside Nextcloud?
Yes. You can install the Collabora Online or OnlyOffice app from the Nextcloud App Store. This allows you to view, edit, and collaborate on .docx, .xlsx, and .pptx files directly inside your web browser, with real-time multi-user collaboration.
How do I resolve “Strict-Transport-Security” warnings in Nextcloud?
This warning occurs if the HTTP Strict Transport Security (HSTS) header is not set. You must add this header inside your reverse proxy configuration (e.g., Caddy or Nginx) to enforce secure HTTPS connections.
Can I run Nextcloud on a Raspberry Pi?
Yes. Nextcloud can run on a Raspberry Pi 4 or 5 (with at least 4GB of RAM). However, to ensure good performance, avoid using heavy office applications and always use an external SSD for data storage instead of relying on a fragile microSD card.
What should I do if a file is locked in Nextcloud?
If a file gets stuck in a “locked” state, you can clear the locks using Nextcloud’s command-line tool (OCC). You must turn on maintenance mode, run occ files:cleanup, and then turn maintenance mode off. (Properly configuring Redis usually prevents this entirely).
Does Nextcloud support Two-Factor Authentication (2FA)?
Yes. Nextcloud supports robust 2FA. You can enable the TOTP (Time-based One-Time Password) app from the internal app store, allowing you to secure your account using Google Authenticator, Authy, or Vaultwarden.
How do I back up my Nextcloud instance?
A proper Nextcloud backup requires two steps: dumping the SQL database and archiving the actual data directory. You must back up both simultaneously (ideally while the instance is in maintenance mode) to prevent data corruption or missing file linkages.

Discussion
Loading comments...