

If you want to self-host n8n, Docker Compose is one of the easiest and most reliable deployment methods. It provides persistent storage, simple updates, and an isolated environment that works consistently across Windows, macOS, and Linux.
In this guide, you’ll learn how to install n8n with Docker Compose, configure persistent data, connect a PostgreSQL database, and apply recommended security practices for both development and production environments.
Whether you’re automating business processes, AI workflows, or personal tasks, this tutorial will help you get n8n running in just a few minutes.
Why Install n8n with Docker Compose?
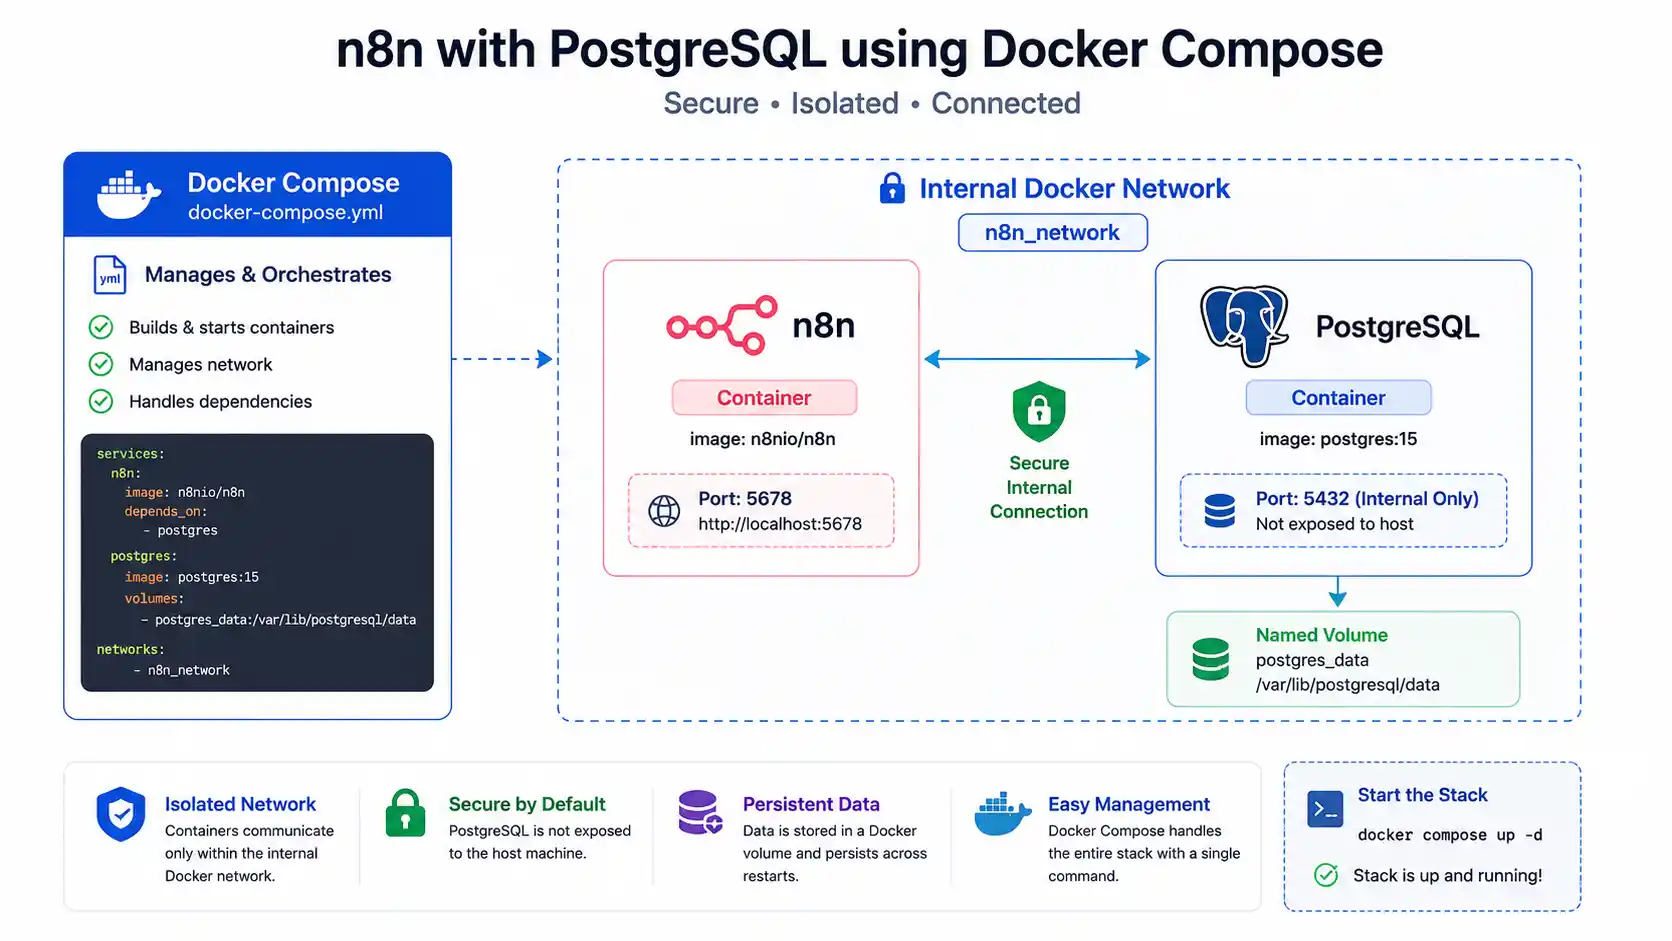
Deploying n8n using Docker Compose offers a multitude of benefits over running a raw Node.js script. It allows you to define your entire infrastructure—including the n8n application, your database, and any custom environment variables—as code.
With Docker Compose, your n8n Docker setup remains isolated from the host machine, preventing dependency conflicts. Additionally, it guarantees that whether you are running n8n on Windows, macOS, or Linux, the behavior and performance remain identical.
System Requirements
Before you start to install n8n, make sure your server or local machine meets these requirements:
- Memory: At least 1 GB of RAM (2 GB or more is highly recommended for complex workflows).
- Software: Docker and Docker Compose installed on your system.
Install Docker and Docker Compose
To get started, you will need the Docker engine and Docker Compose plugin.
Windows and macOS
For Windows and macOS, download and install the official Docker Desktop executable. Run the installer and follow the on-screen prompts. It includes both Docker Engine and Docker Compose out of the box.
Linux (Ubuntu/Debian)
If you are using Ubuntu or Debian, you can install Docker and Docker Compose using apt:
sudo apt update
sudo apt install docker.io docker-compose-plugin -y
sudo systemctl enable --now docker
Linux (CentOS/RHEL)
For CentOS, RHEL, or Fedora-based distributions, use yum or dnf:
sudo yum install docker docker-compose-plugin -y
sudo systemctl enable --now docker
Create the n8n Project Directory
It’s best practice to keep your Docker Compose files organized in dedicated folders. Open your terminal and create a new directory for your n8n Docker Compose setup:
mkdir n8n-docker
cd n8n-docker
Create the Docker Compose File
Inside your new directory, create a file named docker-compose.yml. This file tells Docker exactly how to configure and run your containers.
We will use PostgreSQL as the backend database because it is recommended by the official n8n documentation for better performance and reliability.
services:
  postgres:
    image: postgres:16
    restart: always
    environment:
      - POSTGRES_USER
      - POSTGRES_PASSWORD
      - POSTGRES_DB
    volumes:
      - db_data:/var/lib/postgresql/data
    healthcheck:
      test: ['CMD-SHELL', 'pg_isready -h localhost -U ${POSTGRES_USER} -d ${POSTGRES_DB}']
      interval: 5s
      timeout: 5s
      retries: 10

  n8n:
    image: docker.n8n.io/n8nio/n8n
    restart: always
    environment:
      - DB_TYPE=postgresdb
      - DB_POSTGRESDB_HOST=postgres
      - DB_POSTGRESDB_PORT=5432
      - DB_POSTGRESDB_DATABASE=${POSTGRES_DB}
      - DB_POSTGRESDB_USER=${POSTGRES_USER}
      - DB_POSTGRESDB_PASSWORD=${POSTGRES_PASSWORD}
      - N8N_BASIC_AUTH_ACTIVE=true
      - N8N_BASIC_AUTH_USER
      - N8N_BASIC_AUTH_PASSWORD
    ports:
      - "5678:5678"
    depends_on:
      postgres:
        condition: service_healthy
    volumes:
      - n8n_data:/home/node/.n8n

volumes:
  db_data:
  n8n_data:
Configure Environment Variables
Instead of hardcoding passwords in the docker-compose.yml file, we use a .env file. Create a file named .env in the same directory and add your secure credentials:
POSTGRES_USER=n8n
POSTGRES_PASSWORD=your_strong_db_password
POSTGRES_DB=n8n
N8N_BASIC_AUTH_USER=admin
N8N_BASIC_AUTH_PASSWORD=your_strong_admin_password
Configure Firewall Rules (Allow Port 5678)
Before starting the containers, ensure your system’s firewall allows traffic on port 5678 so you can access the n8n web interface.
Linux (UFW - Ubuntu/Debian)
If you are using UFW (Uncomplicated Firewall), run the following commands to allow the port and reload the rules:
sudo ufw allow 5678/tcp
sudo ufw reload
Linux (Firewalld - CentOS/RHEL)
If your distribution uses firewalld, run:
sudo firewall-cmd --permanent --add-port=5678/tcp
sudo firewall-cmd --reload
Windows
Windows Defender Firewall will usually prompt you to allow access the first time you run Docker. If you need to add it manually:
- Open Windows Defender Firewall with Advanced Security.
- Click Inbound Rules > New Rule.
- Select Port, click Next, and enter
5678for Specific local ports. - Allow the connection and apply it to your active profiles.
macOS
macOS comes with an application firewall that prompts you automatically. If you have the pf firewall enabled manually, you will need to add a rule to /etc/pf.conf:
pass in proto tcp from any to any port 5678Then reload the firewall with sudo pfctl -f /etc/pf.conf.
Start the n8n Containers
With your files in place, you are ready to bring up your workflow automation server. Run the following command in your terminal:
docker compose up -dThe -d flag runs the containers in the background (detached mode). You can monitor the startup process by checking the logs:
docker compose logs -f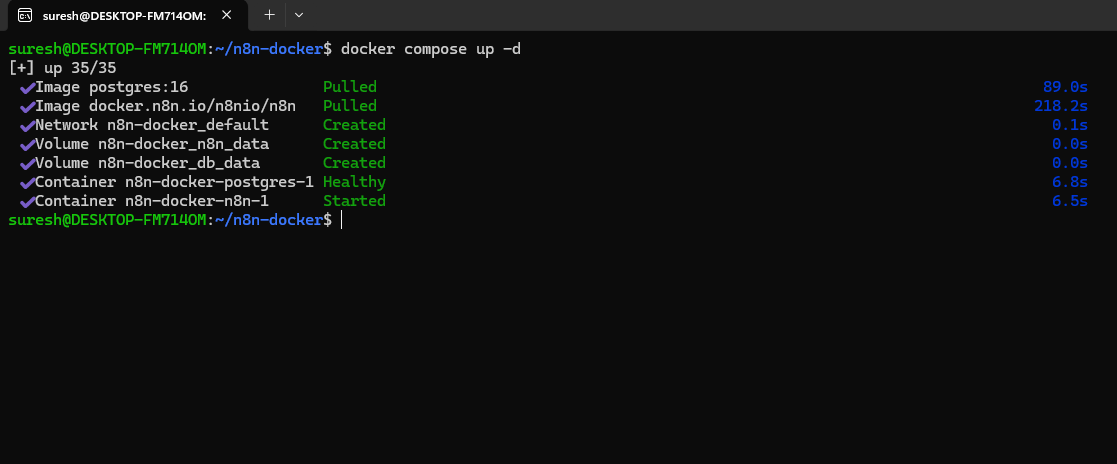
Access the n8n Web Interface
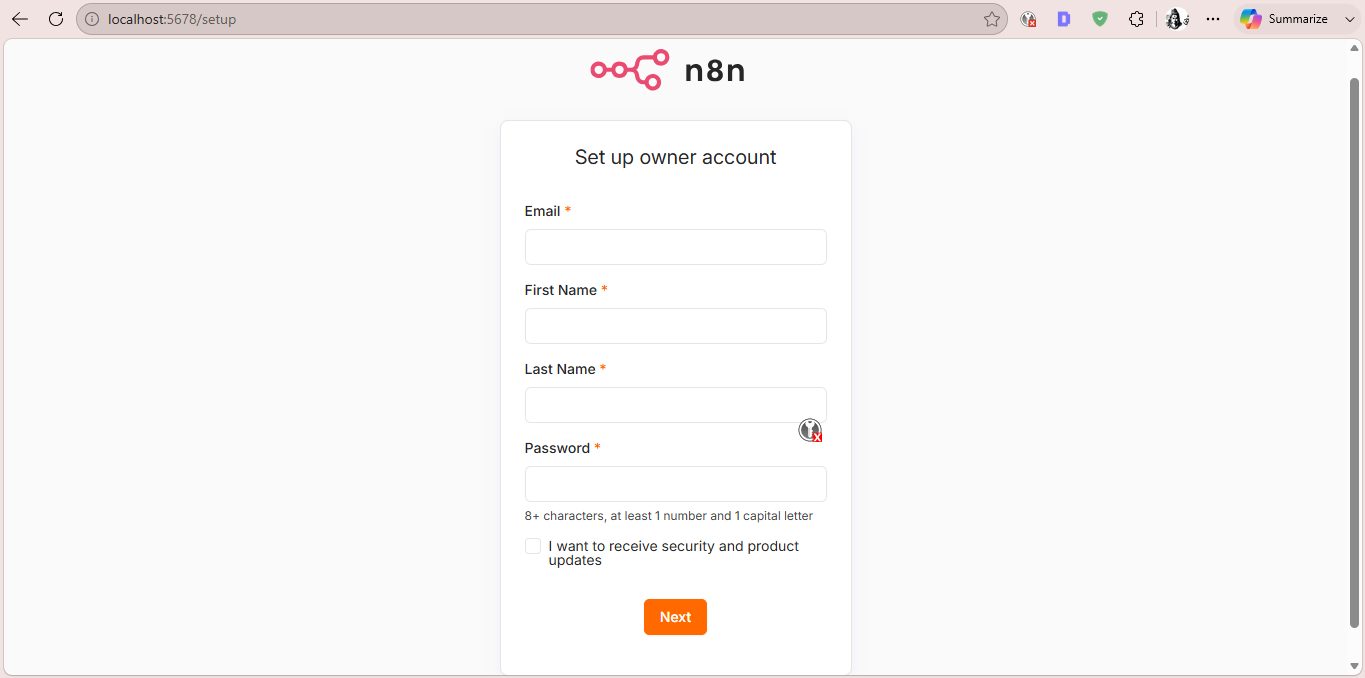
Once the containers are running, open your web browser and navigate to http://localhost:5678 (or your server’s IP address).
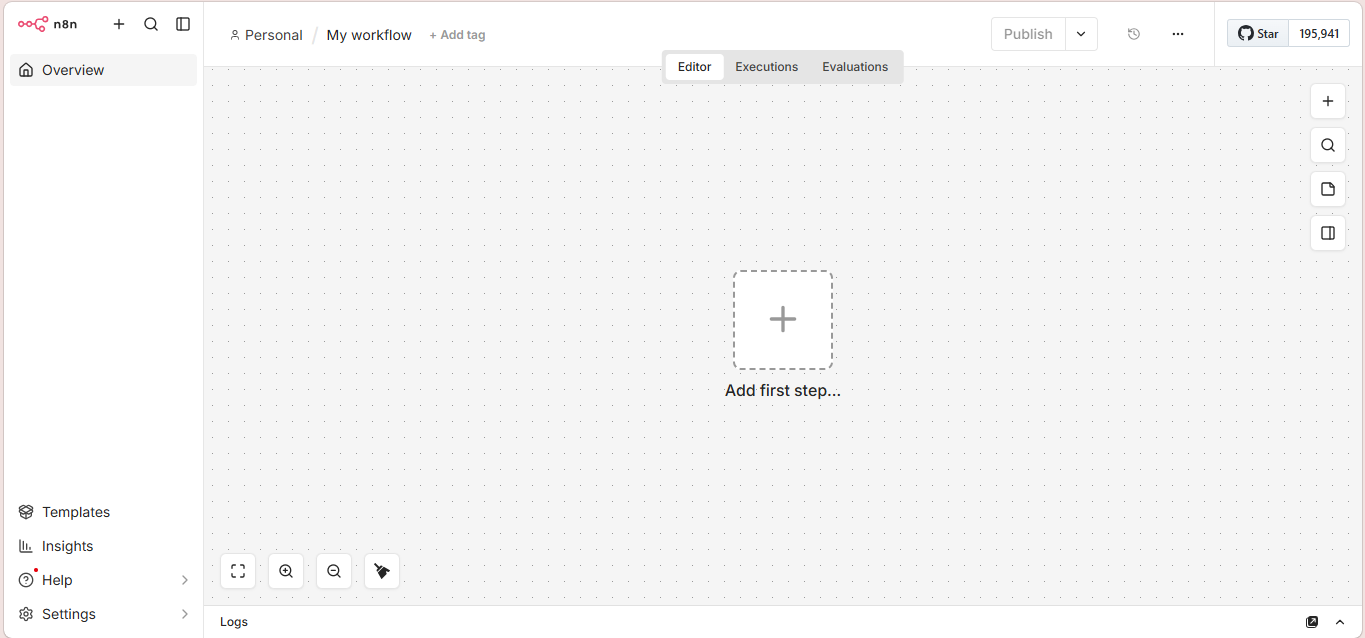
You will be prompted to enter the basic authentication credentials you configured in your .env file. After logging in, you’ll be greeted by the n8n editor, ready to build your first workflow.
Windows-Specific Setup
If you are running n8n on Windows, you should ensure Docker Desktop is configured to use the WSL 2 backend. This provides significantly better performance and file I/O operations compared to the older Hyper-V backend. You can enable this in the Docker Desktop Settings under the “General” tab.
macOS-Specific Setup
For n8n on macOS, the Docker Compose process is seamless. Docker Desktop provides native support for Apple Silicon (M1/M2/M3 chips) as well as Intel Macs. The official n8n Docker image is multi-architecture, so it will pull the correct ARM64 or AMD64 image automatically based on your hardware.
Linux-Specific Setup
When installing n8n on Linux, you might occasionally run into folder permission issues, especially if using bind mounts instead of named volumes. The docker-compose.yml provided above uses Docker-managed named volumes (n8n_data), which automatically handles the permissions for the internal node user (UID 1000) that runs the n8n process.
How to Update n8n
Keeping your self-hosted instance secure and feature-rich requires regular updates. To update your n8n Docker Compose installation, navigate to your project directory and run:
docker compose pull
docker compose up -d
Docker will pull the latest version of the image and recreate the container while preserving your workflows and data stored in the volumes.
Common Installation Errors
- Database Connection Failed: If n8n crashes on startup with database errors, it often means PostgreSQL wasn’t fully initialized before n8n attempted to connect. The
depends_on: postgres: condition: service_healthyblock in our setup typically prevents this. - Port Already in Use: If another service is using port
5678, n8n will fail to bind to it. Change the port mapping in thedocker-compose.ymlto"8080:5678"to expose it on port 8080 instead.
Best Security Practices
If you intend to expose your n8n Docker instance to the internet:
- Never use default passwords for the database or basic authentication.
- Use a Reverse Proxy: Put n8n behind Nginx, Traefik, or Caddy to handle SSL/TLS termination so your traffic is encrypted via HTTPS.
- Set
WEBHOOK_URL: Configure theWEBHOOK_URLenvironment variable to match your external domain, otherwise, webhook URLs generated within n8n will point tolocalhost.
Frequently Asked Questions
How do I install n8n with Docker Compose?
Create a Docker Compose file, configure your environment variables, and start the containers using:
docker compose up -dDoes n8n work on Windows?
Yes. n8n runs on Windows using Docker Desktop with the WSL 2 backend.
Can I install n8n on macOS?
Yes. Docker Desktop supports both Intel and Apple Silicon Macs, making it easy to run n8n.
Is PostgreSQL required?
No. SQLite is suitable for testing, but PostgreSQL is recommended for production because it offers better performance and reliability.
How do I update n8n?
docker compose pull
docker compose up -d
You may also like:
- How to Install Immich with Docker Compose
- Install Jellyfin Using Docker Compose
- Self-Host Stirling PDF
- Install Uptime Kuma
- Install Vaultwarden
Conclusion
You have successfully installed n8n with Docker Compose on Windows, macOS, or Linux. With Docker Compose, updating, backing up, and managing your workflows becomes much simpler than running standalone containers.
If you’re planning to expose your instance online, secure it with HTTPS, use strong credentials, and schedule regular backups of your PostgreSQL database and n8n data directory.
Ready to build your first workflow? Open the n8n editor, explore the available integrations, and start automating repetitive tasks.
Discussion
Loading comments...