

A few years ago, I spent an entire Saturday tearing apart my home office looking for a single car repair receipt. I had three massive filing cabinets stuffed with utility bills, tax returns, and appliance manuals. When I finally found the receipt, it had faded into illegibility. That was the day I decided to go completely paperless.
If you value your privacy, dumping unencrypted tax documents into Google Drive or Dropbox is a terrible idea. Those platforms lack real End-to-End Encryption, meaning they scan your files to train their AI models. The data contained in a single tax return is an absolute goldmine for Open Source Intelligence (OSINT) harvesting. Whether you are building an enterprise archive under strict software development lifecycle (SDLC) rules or just trying to organize your home, you need a private solution.
This is where Paperless-ngx comes in. As one of the best open-source software alternatives on the market, it is a document management system (DMS) that turns your server into an intelligent filing cabinet. It uses Optical Character Recognition (OCR) to read the text on scanned images and machine learning to automatically tag and organize them.
In this guide, I will walk you through a complete Docker Compose deployment of Paperless-ngx, including PostgreSQL, Redis, and Tika/Gotenberg integrations.
1. How Paperless-ngx Works Under the Hood
Paperless-ngx isn’t a single application; it’s a microservices stack.
At the center is a Python/Django web server that handles the frontend and API routing (much like the architecture I covered in my guide to building REST APIs with Node.js). However, the real heavy lifting happens in the background.
When you scan a document, Paperless hands it to Redis (an in-memory message broker). Redis queues the job so your web interface doesn’t freeze. A background Celery worker picks up the job and passes it to Tesseract OCR, which extracts the text. Finally, all the extracted text, tags, and metadata are saved permanently into a relational database. I strongly recommend using Postgres over SQLite for this—check out my PostgreSQL vs MySQL comparison to understand why Postgres excels at text search indexing.
If you upload weird formats—like raw emails or complex JSON data structures—Paperless uses Apache Tika and Gotenberg to convert them into standardized PDFs before running OCR. By orchestrating these components, you essentially build your own private AWS environment, bypassing the massive costs I outlined in my AWS vs Azure vs Google Cloud comparison. If you understand what cloud computing is, you understand how powerful it is to run this locally.
2. Paperless-ngx vs. Nextcloud vs. Immich
I often get asked why you can’t just throw PDFs into a regular cloud drive. The difference is the purpose of the software.
If you want to sync generic files across devices, use Nextcloud. If you want to back up family photos with facial recognition, use Immich. If you just need to quickly merge or split a PDF file without uploading it, use Stirling-PDF.
Paperless-ngx is explicitly built for document lifecycle management. It doesn’t just store the file; it reads the text, figures out it’s a water bill from 2024, tags it as “Utilities,” associates it with the “City Water” correspondent, and archives it as an uneditable PDF/A file.
3. Server Prerequisites and Docker Setup
You can run Paperless-ngx on a Raspberry Pi, but OCR processing is CPU-heavy. I recommend running it on a cheap VPS or a dedicated home server running one of the best Linux distros for beginners (like Ubuntu 24.04 LTS).
First, SSH into your server. (If you haven’t already, please follow my guide to secure SSH on Ubuntu to disable password logins). Ensure you have Docker installed by following my installing Docker on Ubuntu guide. The containerized approach here perfectly highlights the benefits discussed in my Docker vs Podman benchmark.
Create your directory structure:
mkdir -p ~/paperless-ngx/{config,data,media,consume,export,pgdata,redisdata}
cd ~/paperless-ngx
You must ensure these folders have the correct ownership so the Docker container can write to them. Review my guide on Linux file permissions, and use my Linux Permission Calculator or File Permission Converter if you get stuck on the chmod math.
4. The Docker Compose Configuration
You can write this YAML file using any of the top 13 Linux CLI text editors (I prefer Micro).
micro docker-compose.ymlOr, you can use my Docker Compose Generator to scaffold it. Paste this production stack:
version: '3.8'

services:
  broker:
    image: docker.io/library/redis:7-alpine
    container_name: paperless-redis
    restart: unless-stopped
    volumes:
      - ./redisdata:/data

  db:
    image: docker.io/library/postgres:16-alpine
    container_name: paperless-db
    restart: unless-stopped
    volumes:
      - ./pgdata:/var/lib/postgresql/data
    environment:
      POSTGRES_DB: paperless
      POSTGRES_USER: paperless
      POSTGRES_PASSWORD: ${DB_PASSWORD}

  gotenberg:
    image: docker.io/gotenberg/gotenberg:8
    container_name: paperless-gotenberg
    restart: unless-stopped
    command:
      - "gotenberg"
      - "--chromium-disable-javascript=true"
      - "--chromium-allow-list=file:///tmp/.*"

  tika:
    image: docker.io/apache/tika:latest
    container_name: paperless-tika
    restart: unless-stopped

  webserver:
    image: ghcr.io/paperless-ngx/paperless-ngx:latest
    container_name: paperless-webserver
    restart: unless-stopped
    depends_on:
      - db
      - broker
      - gotenberg
      - tika
    ports:
      - "8010:8000"
    volumes:
      - ./data:/usr/src/paperless/data
      - ./media:/usr/src/paperless/media
      - ./export:/usr/src/paperless/export
      - ./consume:/usr/src/paperless/consume
    env_file: .env
The Environment Variables
Next, create the .env file to hold your secrets. You can build this using my .env Generator.
micro .envPAPERLESS_URL=http://your-server-ip:8010
PAPERLESS_SECRET_KEY=YourSuperSecretDjangoKey!
PAPERLESS_TIME_ZONE=America/New_York
DB_PASSWORD=YourDatabasePassword123!
PAPERLESS_DBUSER=paperless
PAPERLESS_DBPASS=YourDatabasePassword123!
PAPERLESS_DBNAME=paperless
PAPERLESS_REDIS=redis://broker:6379
PAPERLESS_DBHOST=db
PAPERLESS_TIKA_ENABLED=1
PAPERLESS_TIKA_GOTENBERG_ENDPOINT=http://gotenberg:3000
PAPERLESS_TIKA_ENDPOINT=http://tika:9998
PAPERLESS_OCR_LANGUAGE=engGenerate secure passwords using my Password Generator and check their entropy with the Password Strength Checker. Never leave these in plain text on your laptop; store them in one of the best password managers like a self-hosted Vaultwarden.
Launch the stack and create your admin user:
docker compose up -d
docker compose exec webserver python3 manage.py createsuperuser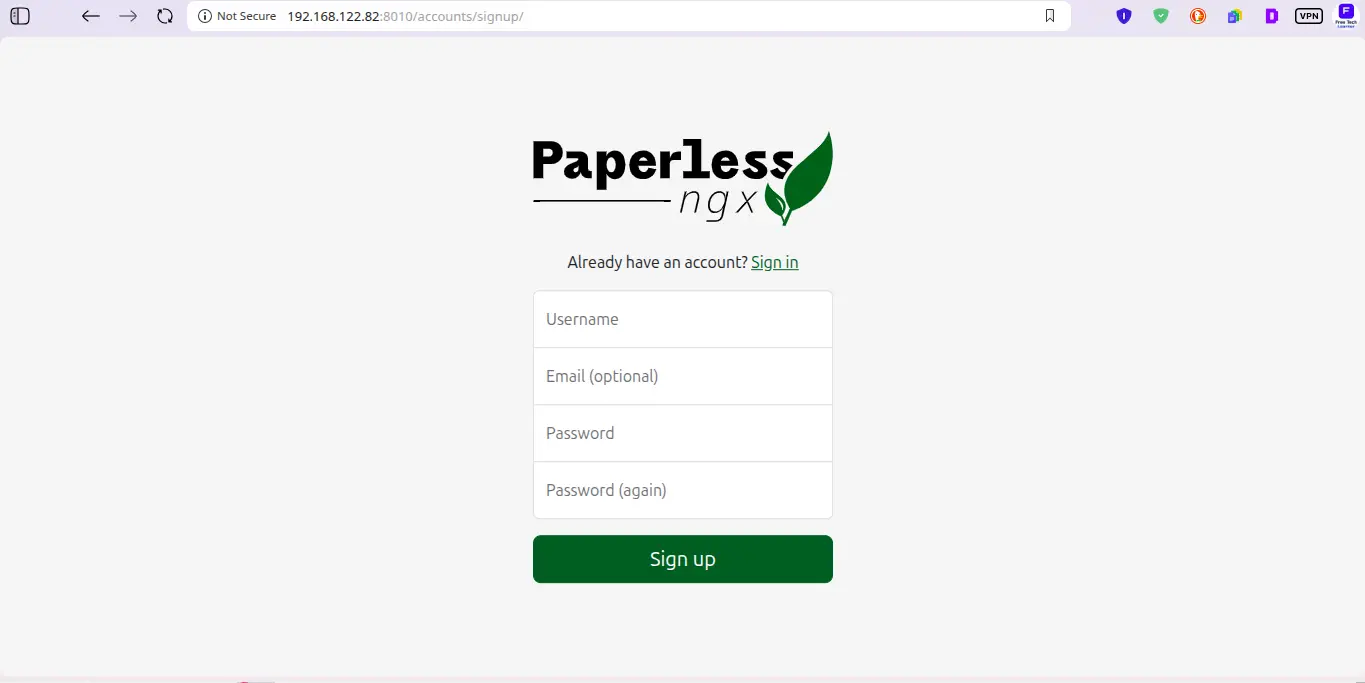
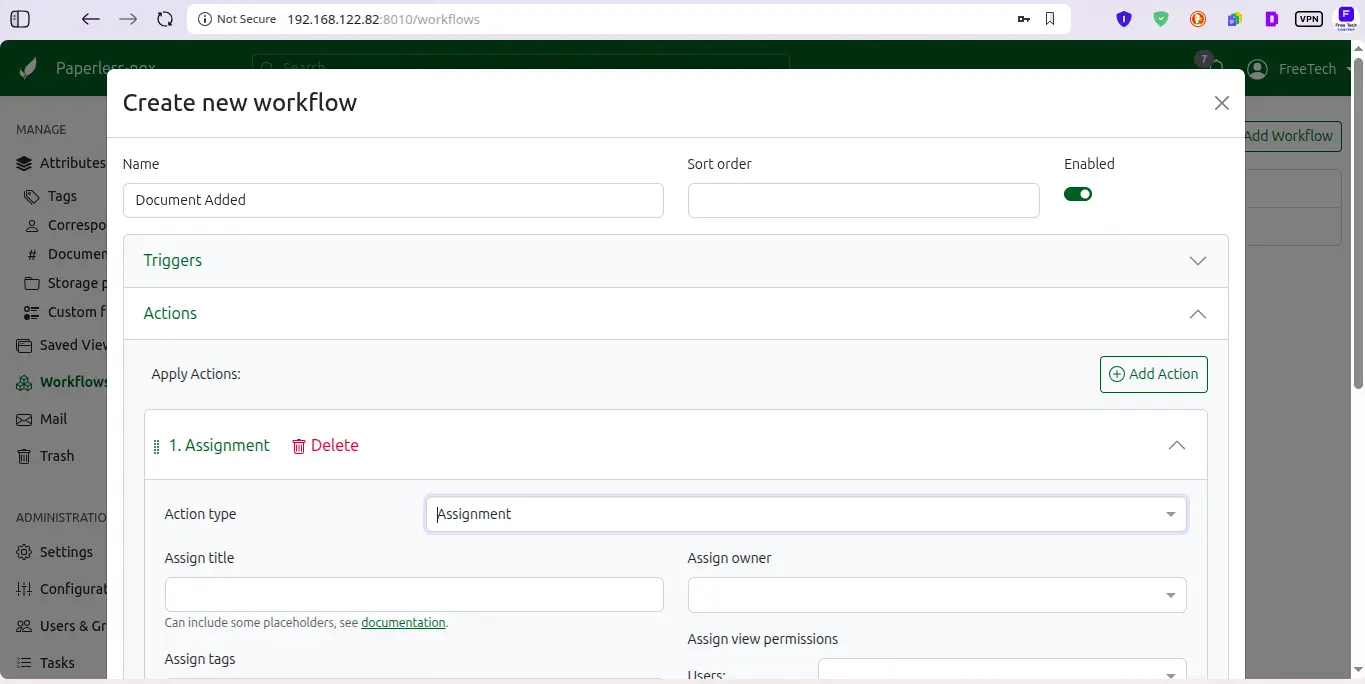
5. Ingestion Workflows and Machine Learning
How do you get physical paper into the server?
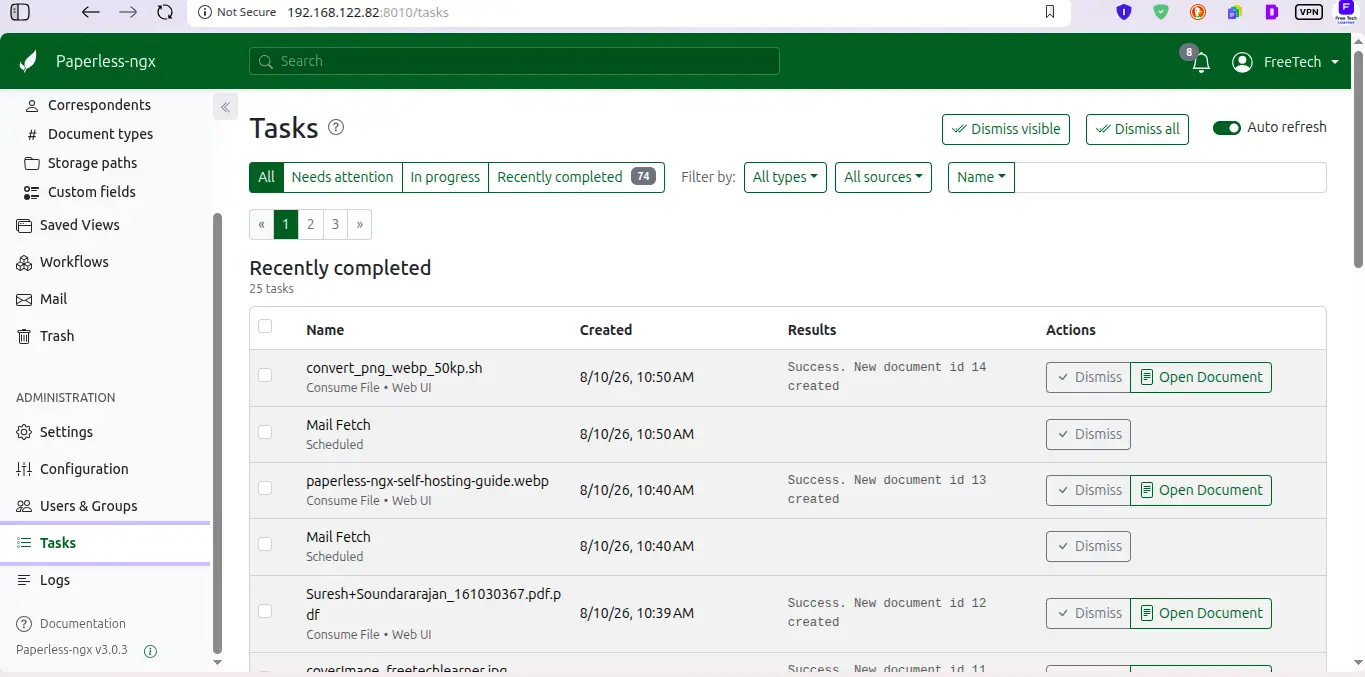
My favorite method is using a mobile scanning app (like SwiftScan) connected to Syncthing. I snap a photo of a receipt, Syncthing pushes it to my server’s consume folder, and Paperless automatically ingests it. Alternatively, if you have a massive network scanner, you can configure it to push PDFs directly to the server via SFTP transfers.
Once the document lands, the OCR engine kicks in. Tesseract bridges the gap between old-school text scanning and modern machine learning vs deep learning by recognizing the geometry of characters.
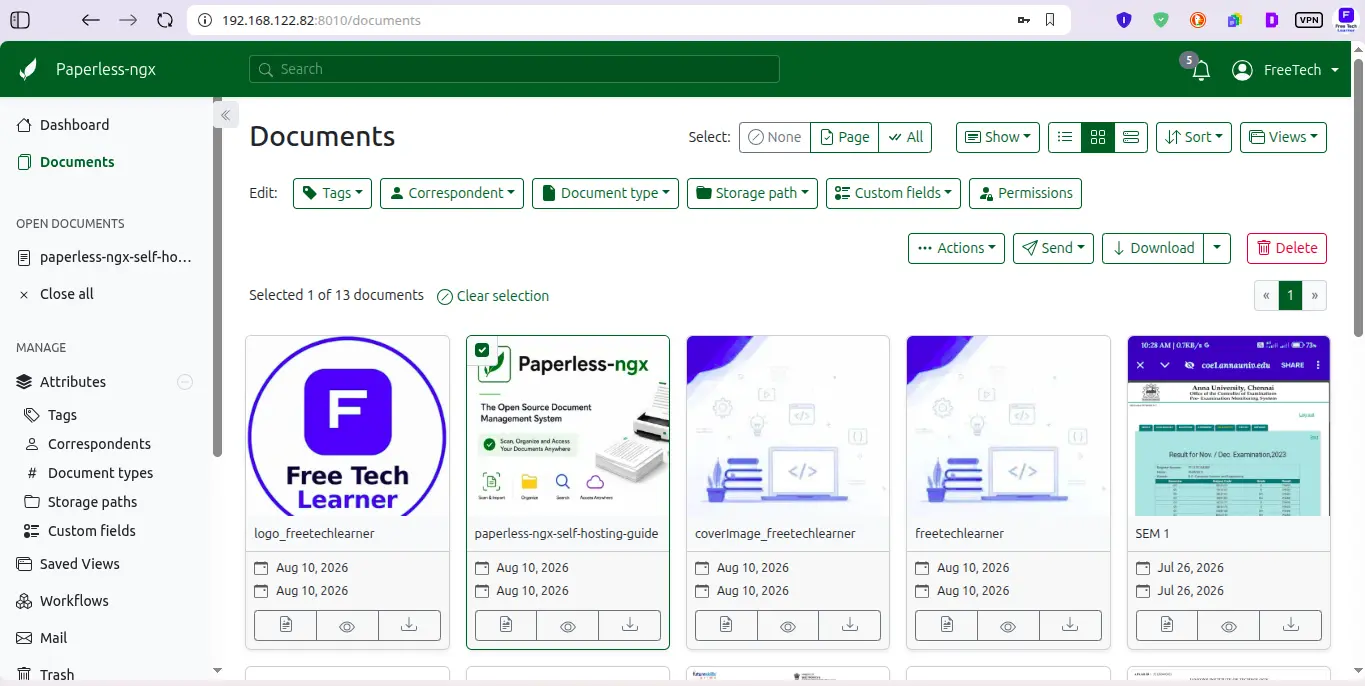
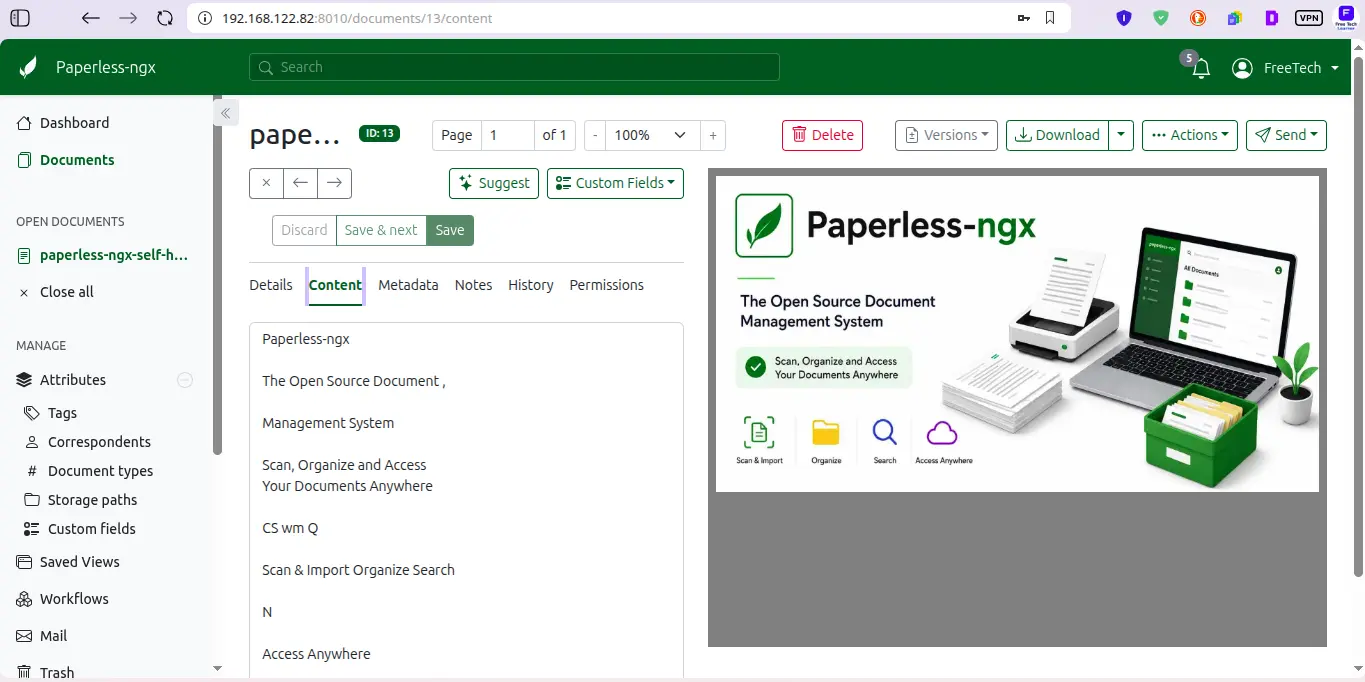
Paperless then uses a matching algorithm to categorize the file. You can use standard keywords, or you can write complex regular expressions to find specific invoice formats. If you are bad at writing Regex, use my interactive Regex Tester to validate your parsing rules before applying them to your database. If you automate this via scripts, you can explore the Linux Command Explorer to build chron jobs.
6. Reverse Proxy and Secure Backups
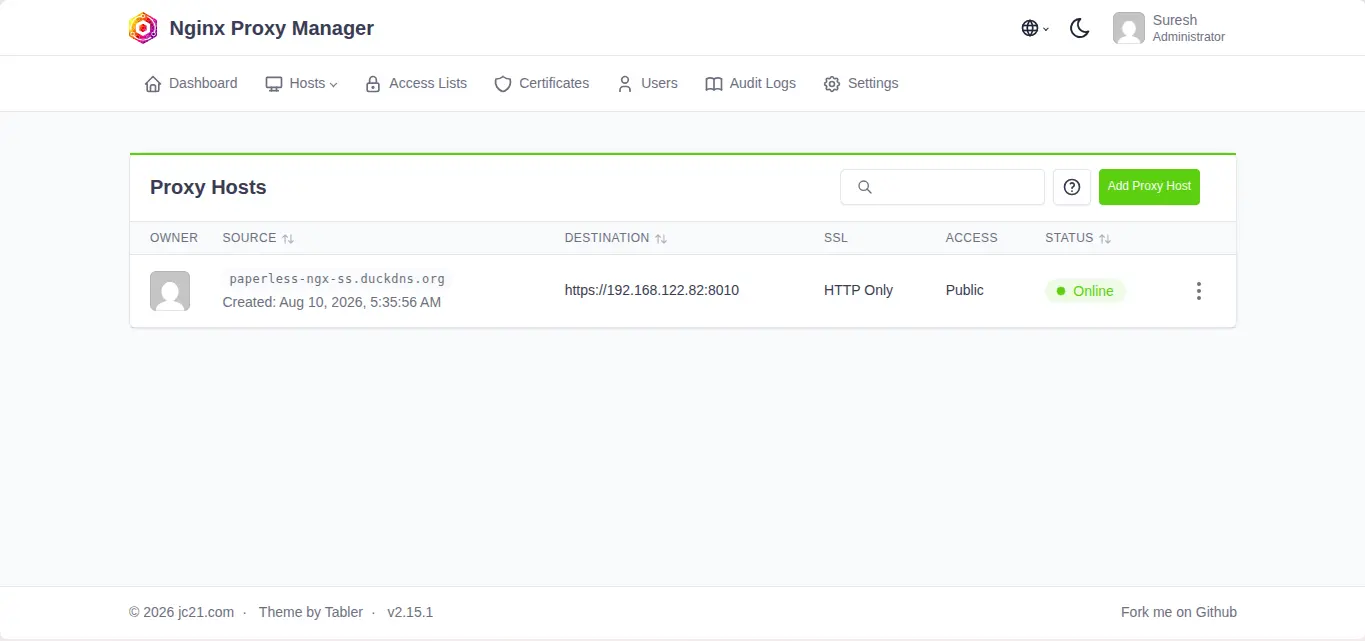
Because Paperless-ngx holds your most sensitive documents, you must secure the web interface with HTTPS. I explain the mechanics of this in my HTTP protocol basics guide.
I recommend putting Paperless behind a reverse proxy like Nginx Proxy Manager or Caddy. If you understand how DNS works, point an A record to your server, generate an Nginx block using my Nginx Config Generator, and enable HTTPS with Let’s Encrypt.
Finally, implement a disaster recovery plan. If your NVMe drive dies, your tax records die with it. Review my master guide on backup strategies for self-hosted servers. You should run the document_exporter command nightly and encrypt the output using Restic or Borg before pushing it to an off-site cloud bucket.
7. Security Hardening & Troubleshooting
If you expose Paperless to the internet, you will get scanned by automated bots within 20 minutes.
To protect your data, I strongly advise running Paperless strictly behind a VPN tunnel like Tailscale or Wireguard. Furthermore, configure a strict UFW firewall on the host and install Fail2ban to block brute-force attempts.
Since you are running secure Docker containers, issues are usually isolated. If Paperless freezes during a massive PDF upload, it is almost always an Out-Of-Memory (OOM) error. Check the container logs using standard Linux log commands to verify. If the JVM crashed, limit the PAPERLESS_TASK_WORKERS variable in your .env file to 1 so the server only processes one document at a time.
Frequently Asked Questions (FAQ)
What are the hardware requirements to run Paperless-ngx?
Paperless-ngx requires a minimum of 2GB RAM and 1 vCPU for basic operations. However, if you are running the full stack with Gotenberg and Apache Tika, or processing massive 500-page PDFs, 4GB of RAM and 2+ vCPUs are strongly recommended to prevent Out-Of-Memory crashes.
How does the “Consume” folder work in Paperless-ngx?
Paperless-ngx continuously monitors the specific consume/ directory on your server’s filesystem. When you drop a PDF, image, or Office file into this folder, Paperless immediately ingests it, runs OCR processing, indexes the text into the database, and deletes the original file from the consume folder.
Can I add support for multiple OCR languages in Paperless-ngx?
Yes! You can specify multiple language codes in the PAPERLESS_OCR_LANGUAGE environment variable separated by plus signs (e.g., PAPERLESS_OCR_LANGUAGE=eng+deu+fra+spa). Paperless-ngx uses Tesseract OCR language packs to process multi-lingual documents seamlessly.
Is Paperless-ngx data encrypted at rest by default?
No. By default, Paperless-ngx stores document files unencrypted on the host volume filesystem so they remain accessible via standard file explorers. If you require encryption at rest, you must host your media volumes on LUKS-encrypted disk partitions or ZFS encrypted datasets.
Can Paperless-ngx run on a Raspberry Pi or ARM64 server?
Yes, the official Paperless-ngx Docker images natively support ARM64 architecture. While it runs perfectly on a Raspberry Pi 4 or 5 (assuming you have the 4GB+ RAM model), OCR parsing will take slightly longer compared to an x86_64 cloud VPS or dedicated desktop CPU.
What is the difference between Paperless-ngx and Nextcloud?
Nextcloud is a general-purpose file syncing and sharing platform (like Google Drive). Paperless-ngx is a dedicated Document Management System (DMS). Paperless actually reads the text inside your PDFs, applies machine learning to tag them automatically, and standardizes them into archival formats.
Do I need to use PostgreSQL, or can I use SQLite?
Paperless-ngx supports SQLite out of the box, which is fine for testing. However, for a production environment with thousands of documents, you should absolutely use PostgreSQL. It handles full-text search indexing and concurrent background worker database writes significantly better than SQLite.
How do I backup my Paperless-ngx instance?
You should use the built-in document_exporter command inside the webserver container. This dumps all your documents, thumbnails, and a manifest.json file containing all your database tags and metadata into a clean export folder, which you can then encrypt and back up offsite.
What do Apache Tika and Gotenberg actually do?
Tesseract OCR can only read images and PDFs. If you try to upload a Microsoft Word document (.docx) or a raw email file (.eml), Tesseract will fail. Gotenberg and Tika run alongside Paperless to automatically convert those obscure office formats into flat PDFs so the OCR engine can read them.
Can multiple users access Paperless-ngx?
Yes. Paperless-ngx has a robust multi-user system with granular permissions. You can create different accounts for your family members or employees, and restrict their access so they can only view documents that share specific tags or belong to specific correspondents.
Discussion
Loading comments...